Being a lazy sort, I originally thought I'd make her one tier version, but once I'd started, it seemed more fun to make the three tier versions. It helped that I had plenty of material, and toning satin bias binding for each of the fabrics, as I'd just been on a run to a new fabric store in town, buying things I liked on spec. So, three dresses made, one for each grand-daughter!
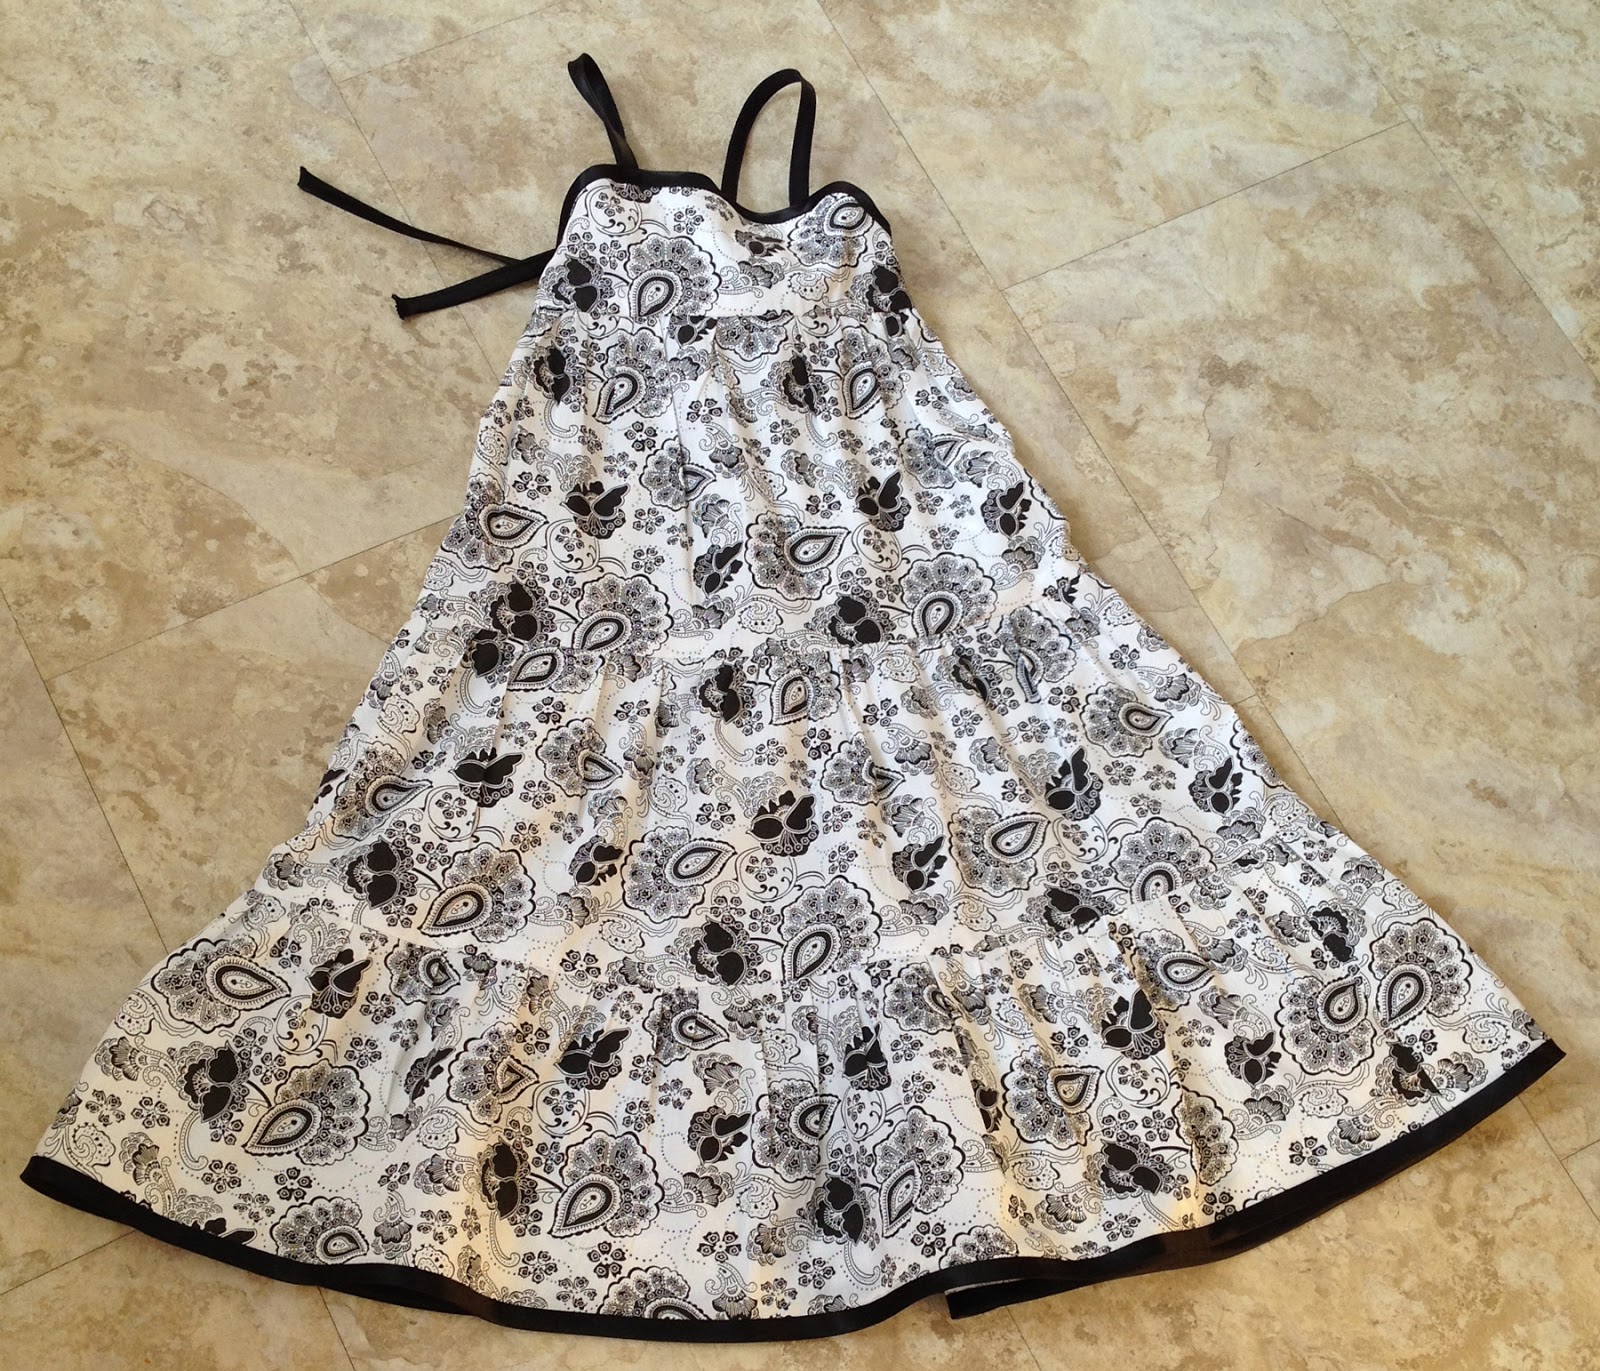
The black and white one (size 4T):

And the dark blue and dusky pink one (Size 3T):

I'll tell you more about where to find the free pattern, and how I made these dresses using it, after the jump.
The Widi Creations pattern has several sizes, a great point in its favour! It comprises a pattern for the bodice front, and a set of measurements for the remaining pattern pieces - which are all rectangles. The tutorial comes in several sections, so it may take a few minutes to hunt down all the pages you need, and to figure out where to start. It's obvious from the comments that some people have had problems with figuring this all out. However, it's a really nice design, so it's worth persevering. I'll give you my tips, based on the experience of making three.
UPDATE JULY 2017: Sadly the Widi Mela pattern seems to be no longer available. Instead, I now recommend this Baste and Gather pattern from which you could make dresses of the same style. I do still have hard copy of the Widi dress. But next time I'll try the Baste and Gather pattern in a three tiered version.
FURTHER UPDATE DECEMBER 2017: The link has now been restored, so I go back to recommending this pattern.
The first one I made was this dark blue floral one. This has tiny flowers in dusky pink, white and red, with a few bits of green leaves. I had found some dusky pink satin double fold bias binding, which I thought would be a perfect trim. You can see the colour combination here. (And yes, I KNOW her self-chosen bag isn't the same colour - that's not my fault!)

What this picture also shows is the neat fit of the bodice. This is the pattern piece that is provided, and it works because the back is elasticated. So the front fits in quite a tailored way, without being tight or constricting.
A couple of points about my approach before I launch into a more detailed 'How to...'
- Firstly, I used purchased bias binding tape rather than making my own.
- Secondly, I found in practice that all the sizes I made came out rather on the long side. I prefer little girls in knee-length, and all of these came out longer on my little grand-daughters. So I recommend you do some careful measurements taking into account the seam allowances betweeen each layer.
- Finally, there were parts of the tutorial I found harder to figure than others, so you may find my tips and comments helpful along the way.
How the Widi Creations pattern for the Mela dress works.
The dress consists of a front bodice, and three wide strips each one wider than the one above, that form the skirt tiers. The bottom tier and the middle tier are the same for front and back, so the pieces for front and back are the same size. For the top tier, the back is longer (deeper vertically) than the front, allowing for the fact that there is a deep turn-down or hem at the top which is elasticated, and that there is no separate bodice section at the back.. The top of this elasticated section at the back lines up with the top of the front bodice at the sides. I hope this picture might make this clearer.

The bodice is double-layered, so that the gathered raw edge of the top front tier is 'trapped' between the two layers.
The first thing you need is to download the Widi Creations pattern. There is a link here you can click to get the free pattern, in sizes from 2T to 7-8T. As I said, this is just for the front bodice, of which you cut one of your outer fabric, and one of the lining (if you use different fabrics). This page also gives you all the measurements for the long strips for the tiers of the skirt, as well as measurements for bias binding, elastic etc.
One small word of warning. I found it initially confusing that Preethi uses 'Length' to denote the longest measurement of the strips of material, (what I've called 'width' above) and 'Breadth' to denote the shorter measurement. This is probably logical in mathematical terms. However, personally I think of the length in terms of the vertical (upwards and downwards) measurement of the finished dress, and the breadth as suggesting the horizontal, i.e. the girth of the child. So in the Widi descriptions, note that the 'length' is how long the strips are which will go horizontally around the child, and the 'breadth' is the depth of the layers.
I mentioned earlier that I found for all the sizes 2T - 4T, the length of the finished dresses came up very long on my grand-daughters. I suggest you measure your child, from between the shoulder blades to where you want the dress to come - maybe around the back of the knee. Then add together the depth of the pieces in the measurements given (the 'breadth'), and take off 6 cm - the seam allowances - and 4.8 cm (the top folds for the elastic casing). Compare this with your child's measurements. As I was making for grandchildren who were not present in my home while I was making these, I didn't have the opportunity to do this. Preethi does give the expected heights of children of different ages, and I admit all three grand-daughters are at the lower end of the height measurements for the sizes I chose for them (2T, 3T and 4.)
This is the 3T as I first made it.

Jane is not yet 3, but even when she is, I think this - almost ground length - would still be too long. So I shortened it by about 6cm, by taking another horizontal seam along each of the two lower layers. I didn't cut the excess off, on the grounds that I may be able to unpick these seams later and restore this to its original length as she grows taller. You can see in the one below how it ended up. (Still not over-short.) And she loves this dress.
I've had to shorten the others as well.
Don't misunderstand me. I am not saying Preethi's patterns / measurements are wrong. I'm just saying - measure your child first!
Once you have downloaded your pattern and measurements, and cut out your pattern pieces, you need the page that shows you how to assemble the bodice and top tier. As I mentioned, you gather the top tier of the front, and catch it between the outer bodice and the lining. You then apply the bias to the top edge to finish it. (I'll say more about this later when I talk about bias binding below.) Then you make a double hem on the top back tier, and sew three horizontal seams. You insert elastic between the two bottom seams, and between the top seam and the top fold. So you have two rows of elastic with a gap in between.
So far, so good. The only bit I was not quite clear on, was how to join the front to the back. Well, obviously, you seam them together, but I wasn't sure how to finish the seams, as these are going to be against the delicate skin of the underarm area on the little girl.

In the end, I settled for tight zigzagging over the edges of the seam allowance (I don't have a serger). This seems to have worked out fine.
Widi's creator, Preethi suggests making your own bias tape, rather than using purchased tape. I'm not at all against making your own (especially since I bought my bias making gadget), and in fact I did use some on the second (jade and grey) dress, for the ties. More on this below. But I really do like this contrast picking out one of the colours, I think it makes the dress look more interesting than if all the binding was self-coloured. And it saves effort!
However, you need to take care then in following the Widi measurements. The instructions appear to suggest you would need 21 cm (about 8 1/4") of bias tape for the top of the bodice for size 2T. I found I needed at least 36 cm. The reason for this is that she is not referring to the finished length of the bias tape you'll need, but the horizontal length of fabric needed from which you would cut a bias strip. At least, that's what I understand from her reply to a comment querying this. This would be no problem if you had plenty of tape, but my recommendation if you are using bought tape is to almost double the amount needed for this purpose. Then you can add that amount to the pieces needed for loops, straps, and the bottom hem. And in cutting the binding to go round the bodice, I suggest you measure it against the bodice!
I found it easiest to attach the straps at this stage. You can catch them in under the bias binding around the bodice.

By the way, it's not essential to bind the bottom of the skirt, which is a very long piece of binding - from just over 2 metres to just over 2 and a half, according to size. You could just turn up a hem. But it does look pretty, especially with the contrasting binding I used.
On the 2T/3T size, I didn't have enough of the jade bias binding to make all of straps, bodice top, loops, and the bottom hem. I did try to buy some more, but none that I could find was exactly the right match. So I used my jade satin pre-made binding for the bottom hem, the bodice top and loops, and the tiny bit left, for a little bow on the front. I made the straps using my bias binding gadget, from the same fabric as the dress. I think it looks OK!

I hope we'll eventually get photos of the 2T/3T one and the 4T one when the girls go on their holiday.
No comments:
Post a Comment