I wrote up the first two, from a fabric called Bear Mountain, a few days ago. If you 'd like to see those, too, they are here and here. Those were for the oldest and youngest grand-children. Now, here is the second fabric.

This fabric is One of the Aunt Grace range, # 6257, by Judie Rothermel for Marcus fabrics, for which I bought 4 fat quarters. Unfortunately it's now out of print. Why do they always do this to me? I just find a lovely fabric I want to buy more of, when it's finished! I could list them - no, stop, it's painful!
Out of the second fabric, I would make two things for the middle two grand-daughters: a top for Rose, age 3, and a skirt for Jane, age 4. Each of these used two of the fat quarters, the skirt with a band of additional fabric.


First, the top. This was an easy make, given that I had used the pattern before. It is the free Flutter top pattern from It's Always Autumn. I made a lovely top for Jane last summer. So it was an obvious choice for a top for Rose this year.
There are only two pattern pieces: the body part and the sleeve part. Having cut them out, all you need to do is sew the two side seams, do whatever you want to do with the hem, attach the sleeves, and finish them, and add elastic into the neck. In fact, it's so easy, I might go and make another one right now! Or maybe I'll finish the blog post first.
In fact, Autumn has done a lovely write up and detailed tutorial, so I can't do better than refer you back to her website. However, here are picture of my make, to prove that even I can do it!
Attaching pompom trim to the edges of the sleeves (and the bottom):

Pinning and attaching the sleeves:

Close up of pinned sleeve:

Pinning and attaching bias tape (armholes and neckline):

Finished top ready to try on:
Whenever I ask the grand-children to try on the things I've made, they do so with alacrity, but often over whatever they happen to be wearing. So here, you see Rose wearing the flutter top together with a swimming cap and a pair of wellie boots! Well, that's kids for you.


At least she's prepared to wear it without the strange accompaniments!


The skirt for Jane was almost as easy. I used the same pattern I had made for skirts earlier in the summer. It comes from This Mama Makes Stuff, if you want to make a pattern for yourself.

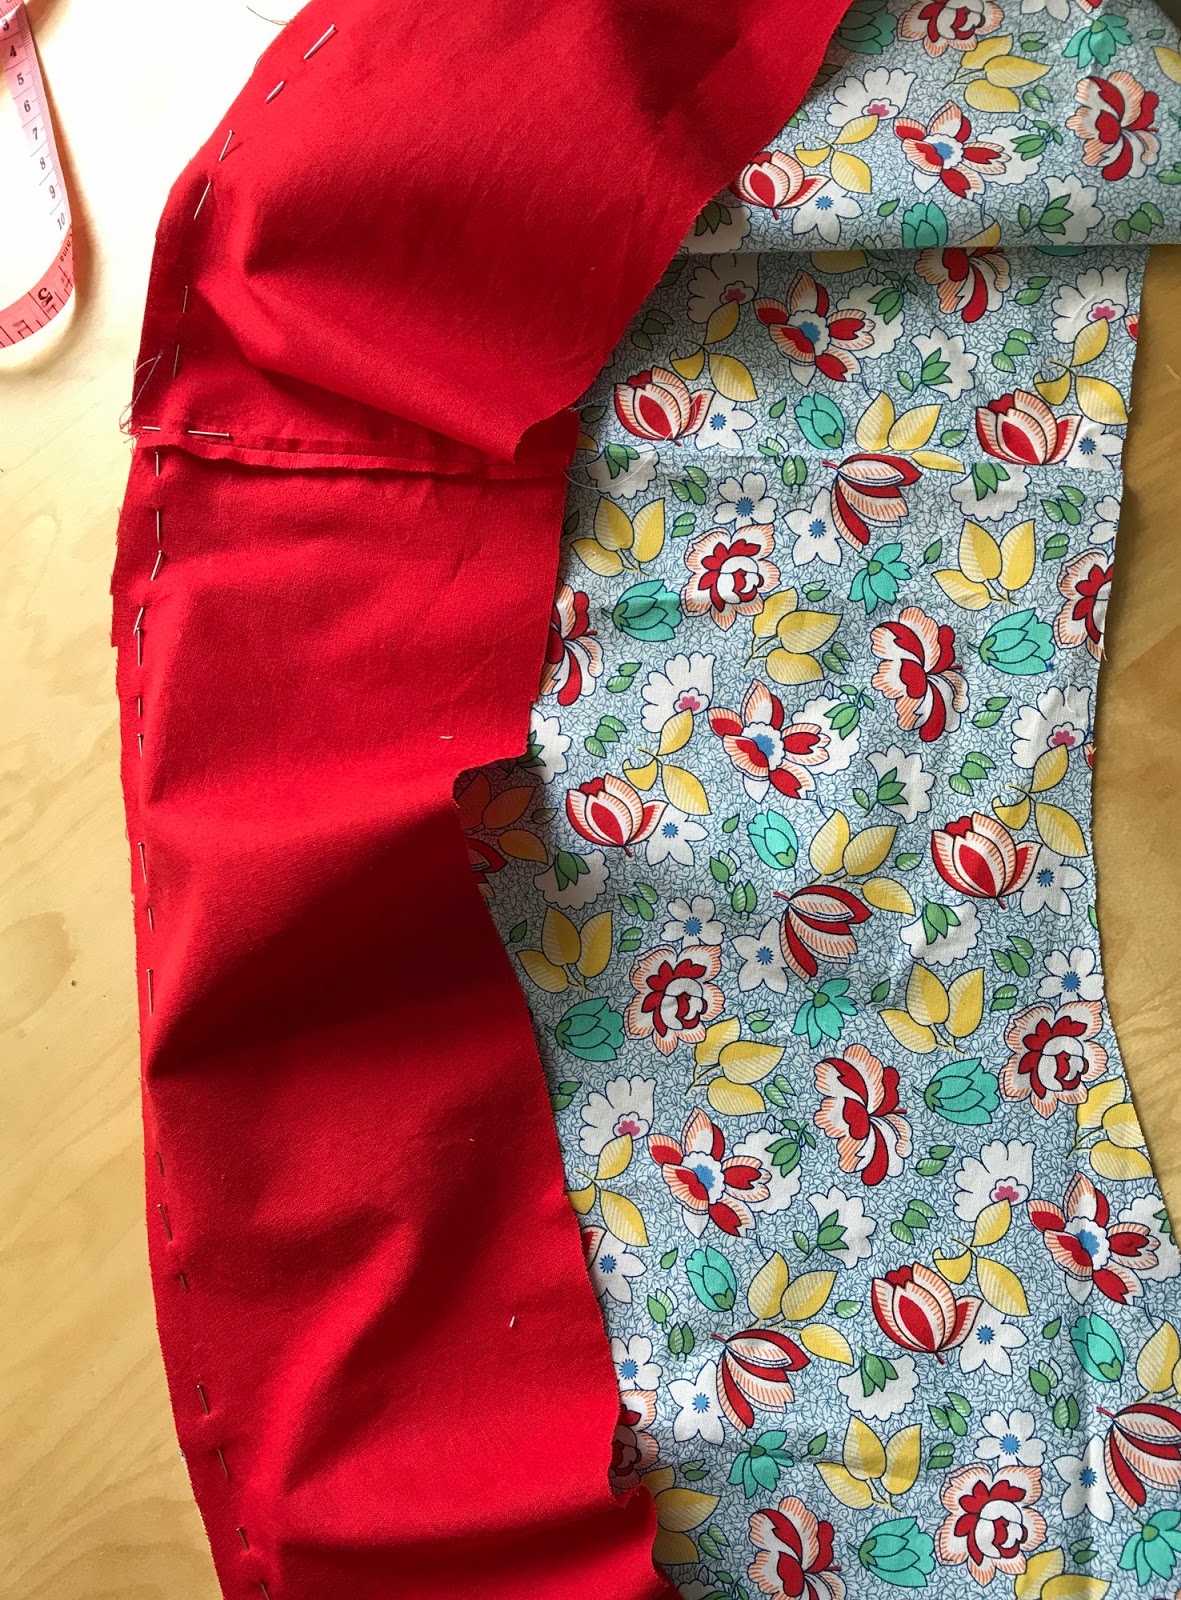
I could see that the width of the fabric would be a challenge for the longer pattern for Jane. It was obvious I would have to add a bit of some other fabric, so I decided I'd add a band of red cotton. You'll see a fold a couple or so inches up from the hem of the pattern above. You might just be able to see that the pattern is pinned to the folded floral fabric, and I could just about get a skirt length to where the hem is folded up.
Below, you can see how I cut the floral fabric on that fold above the hem. In the picture below you can probably see that I crept into the selvedge on the right hand side - just on the very corner. I then re-drew a pattern from about 1" above that hem fold line, and measured 5" deep, to produce a pattern from which I cut the red fabric. (Going an inch above where I'd already cut the floral fabric was so I could have a half inch seam allowance on both skirt pieces.)

In fact, I had to join two red pieces, because the red cotton was also not wide enough to do it all in one.
I had some scraps of the floral fabric left, so I cut them into diagonal strips 2 3/4" wide, and pieced these together to make a wide double fold bias tape about 86" long This would be used for the waistband and hem. I pressed the long joined strip lengthwise at the centre, and with a 3/8" seam allowance also. It makes it easier to sew if you have a fold line to follow.

Below, I've pinned the red fabric and the floral one together, at the half inch seam allowance, and then sewed it.

Next, I used about 54" of my double fold bias tape to make a hem. I first sewed this on the inside following my pressed seam allowance, and then folded it to the outside and pressed a 3/8" seam allowance on the outside, and oversewed it. Here's a view of the inside.

Finally, I used the remainder of the bias tape to make a waistband (this used about 32").
This time, I sewed it to the outside first, then to the inside, leaving a gap of about 2" to thread elastic through. I used 20cm or 3/4" elastic, 21" long. Then I overlapped the elastic and sewed it together. Finally, I closed the gap in the waistband and added a little tag to show the back. Since the front and back are identical but for the seam in the skirt, this wasn't strictly necessary. However, when I looked at it, with the skirt seam at the back, I realised that there was also a seam on the red fabric right at the centre front. I didn't like this (you can see it in the picture at the bottom) and decided to swivel it round to have all the seams at the sides. So the little red tag is not sewn on a seam, but half way between, so there are no seams at the centre back or front.

Here's the finished skirt. Now I just need a picture of Jane wearing it!
(Yes, it's probably cheating to say I got two garments from a yard of fabric, because I used quite a lot of the red fabric too.)
No comments:
Post a Comment