/*CUSTOM CONTACT FORM BY ICANBUILDABLOG.COM */ .contact-form-widget { margin-left:auto; margin-right:auto; width: 600px; max-width: 100%; padding: 0px; color: #000; } .fm_name, .fm_email { float:left; padding:5px; width:48% } .fm_message { padding:5px; } .contact-form-name, .contact-form-email { width: 100%; max-width: 100%; margin-bottom: 10px; height:40px; padding:10px; font-size:16px; } .contact-form-email-message { width:100%; max-width: 100%; height:100px; margin-bottom:10px; padding:10px; font-size:16px; } .contact-form-button-submit { border-color: #C1C1C1; background: #E3E3E3; color: #585858; width: 20%; max-width: 20%; margin-bottom: 10px; height:30px; font-size:16px; } .contact-form-button-submit:hover{ background: #ffffff; color: #000000; border: 1px solid #FAFAFA; }

Welcome to my Blog

I am a grandmother to 4 little girls. I blog about the things I make for them, review patterns, provide tutorials on how I've dealt with techniques or problems, which I hope may help others, and give links to the (mostly) free patterns I use. Every so often, I do a 'Best of..' post listing the best free patterns I've found under specific headings - babies, girls, boys etc. Enjoy the Blog!

Thursday 27 July 2017

Adapting Pattern Sizing - How I Resized a Shorts Pattern

Recently, I made a number of pairs of shorts using the Craft Passion kid shorts pattern. It is only made in sizes age 3 and age 7 (and the author says the sizes may be small, as they are for an Asian sized child). I decided the age 7 would probably work for Fleur. She's only 3 and three-quarters, but very tall for her age, and mostly wearing age 5-6 clothes. So if an Asian size 7 would come up small, that would probably be OK. Rose is 2 and a half, but I figured the age 3 would work for her. But what to do about Jane, who is 3 and a half, and now starting to grow  into size 4-5 clothes? I decided a bit of interpolation would be needed. It doesn't usually work to just take an even amount off, or add an even amount on all the way round a pattern. In this post, I'll show you how I did it, in case you have a pattern you need to alter size-wise. 

Here is the first pair of shorts made from the size 7 pattern.

Age 7

In this case, it was fortunate that two pattern sizes exist: age 3 and age 7. I was aiming for a size 5 (roughly) and I thought some thing more or less between the size 3 and the size 7 would work. So first, I overlaid the size 3 pattern on the size 7 pattern, and drew round it. I did this such that all the age 3 lines were inside the size 7 lines, by marrying up the side seams. This isn't always possible, but it worked in this case. I then marked points exactly half way between the two sizes. You can see below that, at the point where my ruler is, the distance between the size 3 and the size 7 pattern is exactly one inch. So I marked a point half and inch from each. I did this at several points (especially on the curves) and then joined up all my intermediate points.


In the picture above, the outer solid line in the size 7 pattern (with the seam allowance within it). The dashed line is the size 3 pattern. The solid pencil line in between these is my 'Age 5' interpolation. So here is my new size 5 pattern.

You'll note that, at the top, the curve for the pocket has also been changed. I did the same for the actual pocket pattern (interpolating between the size 3 and the size 7) and then transferred the top curve back onto the front shorts pattern piece.


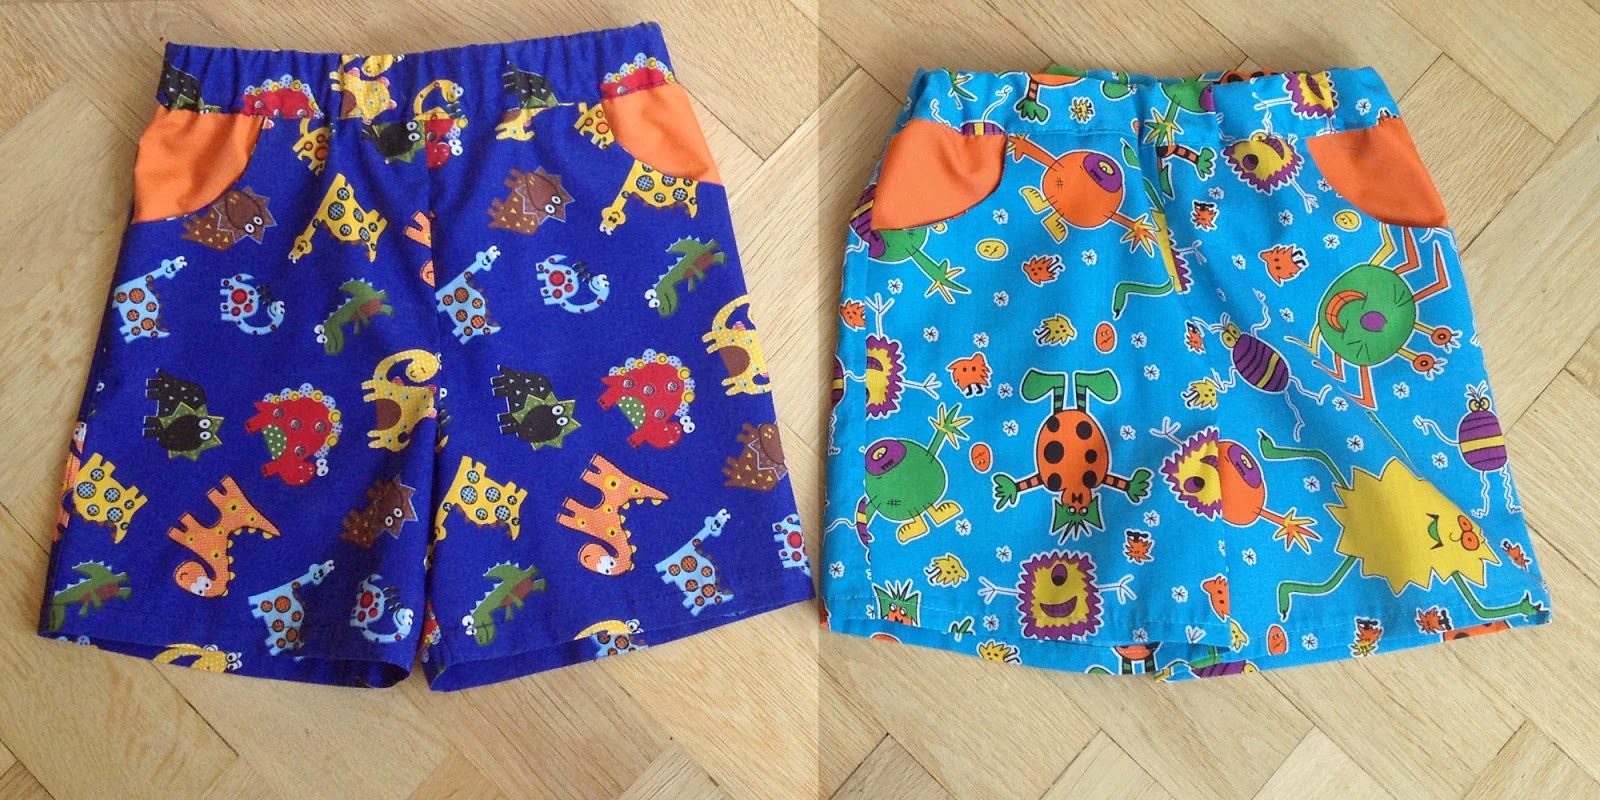
And here are the other two pairs of shorts, size 3 on the right (directly from the Craft Passion pattern) and the size 5 on tghe left, made from my re-designed pattern.
 

                                                    Age 5                                                                            Age 3


No comments:

Post a Comment