/*CUSTOM CONTACT FORM BY ICANBUILDABLOG.COM */ .contact-form-widget { margin-left:auto; margin-right:auto; width: 600px; max-width: 100%; padding: 0px; color: #000; } .fm_name, .fm_email { float:left; padding:5px; width:48% } .fm_message { padding:5px; } .contact-form-name, .contact-form-email { width: 100%; max-width: 100%; margin-bottom: 10px; height:40px; padding:10px; font-size:16px; } .contact-form-email-message { width:100%; max-width: 100%; height:100px; margin-bottom:10px; padding:10px; font-size:16px; } .contact-form-button-submit { border-color: #C1C1C1; background: #E3E3E3; color: #585858; width: 20%; max-width: 20%; margin-bottom: 10px; height:30px; font-size:16px; } .contact-form-button-submit:hover{ background: #ffffff; color: #000000; border: 1px solid #FAFAFA; }

Welcome to my Blog

I am a grandmother to 4 little girls. I blog about the things I make for them, review patterns, provide tutorials on how I've dealt with techniques or problems, which I hope may help others, and give links to the (mostly) free patterns I use. Every so often, I do a 'Best of..' post listing the best free patterns I've found under specific headings - babies, girls, boys etc. Enjoy the Blog!
Showing posts with label My Free Patterns. Show all posts

Wednesday, 13 November 2019

Free A-Line Patterns

As you'll have gathered if you are a regular reader, I'm a huge fan of a basic A-line pattern, I think it's the most versatile. See what I mean on this post. 


 However, some of the free A-line PDF patterns that I used to use no longer seem to be available, or if they are, they are not supported. Either that, or the girls have outgrown the sizes available. Most of the dresses I made last year have used a pattern I've designed, drawn on newspaper. So I will shortly be putting my own pattern on the blog, it will be free, and will have a number of sizes. In the meantime, here are some I have used, they may work for you. 

Let's talk pockets - and some free pocket templates

As well as having a practical purpose, pockets can be a great decorative feature for children's clothes. And kids love them. It's very easy to design pockets, but in case you don't want to design your own, I have some templates for you. 

Here's a little pair of reversible trousers in age 9-12 months. I made them so the pocket on each face would be on the left leg. These were tiny pockets, each just a simple rectangle with the edges turned in - just big enough to get a little Duplo figure in, for example, or a little dinosaur.

And these little plasticized toddler play aprons each have a single layer round-bottomed pocket attached, edged with double-fold bias binding tape. Useful for putting the crayons in, or mixing spoons while baking!


To get more pocket ideas, or to find about more about how to make pockets, and to find my templates, read on!

Monday, 7 October 2019

Wrap dress for girls - a Tulip Hem dress for 5 and 7 years - with thanks to BloomsnBugs

Two to three years ago, I was busy making Tulip Hem dresses from the Blooms and Bugs pattern, designed for c. 3 year olds. (Big thanks to the BloomsnBugs blog!) See my earlier post. But I haven't made any since then, because I haven't had three-year-olds to make dresses for. The Tulip Hem dress is a pretty design, with a wrap over front. Here's one I made earlier for Jane when she was 3.


Although BloomsnBugs fasten theirs with buttons, I used strings (a pair inside and out) to allow for growth widthwise. 

Read on to see how to make one in a larger size (with a new free pattern).

My free PDF patterns - tutorial

On my blog, I've provided a number of free PDF patterns. I'm not a professional designer, these are all things I've made successfully for my grand-children. So I don't have sophisticated layers, or A0 printing, or 12 sizes on each pattern - they are fairly simple. But you may want a few tips for how to use them.

They are intended for printing at home, on either A4 paper or letter paper. You should download them and print them from your computer, for example using Adobe Acrobat, rather than printing them out directly from the internet - that way you can control the printing size. They should all be printed 'Actual Size' i.e. no scaling. They should also be printed single-sided if there is more than one page. (I've made that mistake before, when I forgot the printer had last printed a double-sided document.)

All include seam allowance as described in the relevant tutorial. On most patterns, this is 3/8" or 1 cm. But check the tutorials.

There are four different types, which will need to be used in slightly different ways.

1) On some patterns, such as the Girls' Wrap Dress, or the Girls' Pinafore Dress, the pattern runs to a few pages (but not dozens!) They all include a test square, generally on Page 1, so I suggest you print just that page first to check it is printing correctly. These patterns have letters to indicate which pages join together. But the pattern is all contained within a border. You can either trim off all the borders after printing and put the sheets edge to edge to join them, or (my preference) just trim one of two adjacent borders, and move the trimmed piece so that the edge overlaps the untrimmed sheet. (You may need to trim, say, a side and a top border from some pages.) This shows (on another draft pattern) how the pages overlap and the letters, A, B, C etc match up. The letters may be in circles or diamonds.

Use sticky tape or stick glue to attach them together. Then you can trace the size you want, or cut round the size you want, ready to use to cut out your fabric. Note the markings:

  • Straight grain - the pattern piece should be placed on the straight grain i.e. parallel to the selvedge
  • Place on fold - the fabric should be folded so you put this line against the fold - do not cut along this line.
  • The small circles in the corners of pattern pieces mark the seam allowance. (On multi-size patterns, having the complete seam allowance drawn in could be very confusing!)
  • The small triangles on the edges of each pattern piece are so that you can match them when sewing seams.


2) Like the Girls' Wrap Dress, some other patterns also include a test square for sizing, and should be attached together after printing, in the same way. However, I made a decision on patterns like the A-line dress, not to draw out the entire pattern for you to print, as it would run to many pages. Some of these might be more or less blank, or just have one line on them - a waste of printing ink!. So on the A-line dress, I've provided you with (most of) the bodice on just 4 printed sheets, and given measurements so you can extend the side seams to the appropriate length. 

You can either lay the pattern, once you've cut round or traced the size you want, on another large sheet of paper (I use broadsheet newspapers or spare wrapping paper saved for pattern making), and complete the pattern. Or you can place your pattern piece on the fabric and draw the extension lines directly on to the fabric. I usually prefer to make a complete pattern so I can easily re-use it.

3) Some, especially doll patterns, or very small baby clothing like hats or boleros, fit on one sheet. Many of these are drawn on 1" or 1/2" graph paper so that you can check they have printed the right size. Once printed (and the size checked) you can just cut out the pattern piece.

4) My dining harness pattern, as an example, is quite large. It is also drawn on graph paper, but it has several sheets. There is a layout plan provided (on P3) and each sheet has alphabetical letters to show which pages join to each other. 


However, all the borders (the part of the page which doesn't have graph squares) should be trimmed off, and the pattern then joins edge to edge. The best plan is to put them together with sticky tape. Alternatively, you can just trim one on the joining border and use stick glue or tape to overlap the pages so the pattern edges meet. On one page, note that the pattern piece does not reach the border, so the piece needs to be further trimmed to the line with the letters, so that the letters meet the letters on the piece to which it attaches.

Saturday, 21 September 2019

A Little Pinafore Dress

This summer, Rose, 4, said she would like a pinafore dress to wear with T shirts. I had made one in a tartan pleated style for her cousin eighteen months earlier, using an adaptation of the Ikatbag shortalls pattern, but that pattern was too small for Rose now. I needed to make it in a 5-6. So Rose's grey and floral pinafore dress below was from my own pattern. (If you need a size 2-3, then by all means use the Ikatbag pattern.) You'll find my free tutorial and pattern at the bottom of this page.

Tuesday, 16 October 2018

Hats for babies and small people - free PDFs

There are several delightful patterns for children's and babies' hats, available as free PDFs on the internet. Usually these have full instructions. I must admit to my favourites, made over and over again because they work so well for my four grand-daughters. But in this post I will also try and provide links and reviews to many of those I've found which have promise. At the time of writing all of these are free. Some require you to register, but there is usually no charge for this.

The above two are from patterns I have made multiple times, especially the one on the right. But for my full review of free Hat PDFs for children and babies, read on!

Premature baby hat - free PDF

A small number of years ago, I was delighted to find a pattern for a premature baby knotted hat from Blesseddesigns.net, when we most needed it. 


Unfortunately the Blessed Designs web site for premature baby patterns no longer exists. I've tried to find it again for your benefit, to no avail. So in the end I created my own pattern for you. It is based on the Blesseddesigns idea, though, as I still have hard copy, so I owe them a debt, even though they no longer seem to exist! To find out more about my (free) pattern, and how to make up a premature baby hat, read on.

Thursday, 20 September 2018

Needle case project - ideal gift! A tutorial

A while ago, I wrote a post about how to make an easy sewing kit case. As I was writing it, I thought the needle case within it might merit a post, too, but it's taken me a while to get round to it.


Before you dismiss the offering below as like the work of a child - it is the work of a child, namely yours truly age 7 or 8. We were required at school to make these needle cases as a Christmas present for Mummy. That is one reason why this is such a nice project - even a child can do it, and it's a great idea for getting your kids sewing. As long as they can hold a needle without stabbing themselves - they can do it.


In this post, I'll tell you how to make a needle case like this, or, if you or your children don't like this little Dutch Doll design, I have several other suggestions for you.

Thursday, 16 August 2018

A summer baby romper

After I had made beach ponchos and hooded towels for the girls this summer, I still had a nice piece of fabric left over. This was a soft stretch towelling.


I thought there would be just enough to make something for the baby, and I had in mind that it reminded me a bit of a little romper suit my daughter had when she was about 16 or 17 months old - though hers was cotton woven fabric - coincidentally it looks a similar colour / design in the photos!


To find out how I made a romper for my grand-daughter, read on.

Sunday, 5 November 2017

My Free Patterns


Here you can find links to some of my own patterns (for which there is no charge). You are welcome to use them for non-commercial purposes, i.e. for your own use. I'm always adding to this collection, so it's worth clicking on the tab at the top of the blog, as well, to see what's new. Some of them require only measurement, whereas for others, there are free PDFs for you to download. Where I make PDFs, I sometimes draw them initially on grid square paper, so that you can check the printed size corresponds to my original. 

Check them out below.

Friday, 3 November 2017

Free Pattern for Baby / Toddler Bolero or Waistcoat

A number of times, I have wanted to make one of the grandchildren a little waistcoat, either for dressing up, or as a little bit of extra warm or style. Each time, I've made my own pattern, so I thought it was time to share the patterns. This would be suitable for a boy or a girl.


Free Pattern - CLICK HERE for the first page and
 CLICK HERE for the second page.

BEFORE YOU CUT:

Above you have the links to the pattern, in 2 pages. It's free, and it shows a one inch square so you can check the printed size is correct. If it isn't, you could use some squared paper and redraw it. On the two pages of the PDF, BOTH SIZE PATTERNS ARE SHOWN. Pattern #1 is the smaller one, for approximately 9-15 months (more about sizing later). Pattern #2 is for approximately 18-24 months. However, boleros are quite forgiving, size wise, as they don't tightly enclose the chest, and the length doesn't need to be exact, either. I suggest if you have a small person to make a bolero for, you measure the patterns down the back fold, and across the back armpit to fold. Then measure your small person from neck to  waist or hip, and from armpit to armpit. Halve the latter measurement. Then see which of the patterns looks the best match, depending on whether you will need a seam allowance.


For the tutorial and more information, read on.

Wednesday, 11 October 2017

Replacement Padded Covers for Baby Car Seat or Buggy Straps

When my daughter found to her delight that she was pregnant again for the second time, it was time to get Jane's old car seat out of storage. Oh dear! One of the covers that should wrap round the shoulder strap to protect the baby from the strap chafing had gone missing.
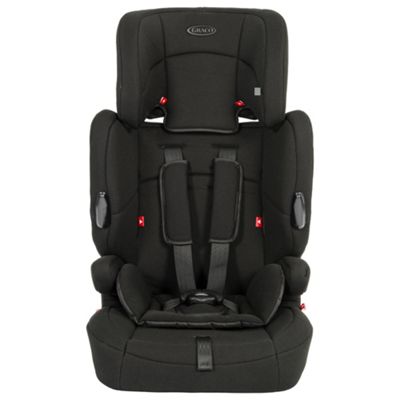
Image result for car seat
It wasn't actually this model car seat, but you can see the padded covers for the straps clearly on this picture as they should be. Two of them. 

So the next sewing request was for a new set of strap covers. (A set, because, of course, you want them to match.) To find out how I made these (easy as pie), read on.

Easy Sunglasses (or Glasses) Case


In the middle of packing a holiday case (yes, I'd left it that late) I realised that none of the cases I had were big enough in depth for either of my two favourite pairs on sunglasses. 


So I had to make a new case, pronto. It had to be able to protect my sunglasses in the suitcase, and when out and about, but I didn't want it to be too heavy.

I knocked up this case in about 7 minutes. You could do a much better job in 15, but I didn't have 15 minutes available!


Friday, 15 September 2017

Free Pattern for Baby Dining Harness

Assuming you have come to this page from my other pages on dining harnesses, go ahead and click on THIS LINK to see the pattern, and download to your computer. If not, please go to THIS PAGE for the tutorial, and THIS PAGE for more information on Baby dining harnesses generally.


Now read on for how to use the pattern.

Tuesday, 6 December 2016

Dolly's Dungarees / Playsuit

One of the outfits I made for Dolly, my grand-daughter's beloved baby doll, was a pair of dungarees, similar to a pair of Jane's own dungarees. I had originally planned to make a short legged playsuit, as all my grand-daughters have been having playsuits for summer (you can read about them in these posts here and here.) However, we are nearing the end of summer as I write this, so I decided to make the legs of Dolly's a little longer for winter. But the pattern I devised will make either.

This will fit a doll approximately 15"-16" tall, about 38-40 cm.

You can find a free pdf pattern and detailed tutorial after the jump.

Red and Grey / White Doll's Dress and Matching Panties

More little clothes for Jane's Dolly. I've written up a tutorial and produced a free PDF pattern for this outfit.


This little dress comes with matching knickers / panties. Dolly is about 15-16" tall (38-40cm), but I think you could easily adjust it for a slightly smaller or larger doll. You can find more about how to make the outfit after the jump.


Friday, 2 December 2016

Top and Pants for Dolly

I've been busy making a few outfits for my grand-daughter's 15" doll. She's had to spend a bit of time recovering from an operation, not allowed to mix with other children until she's back to full strength. So dressing and undressing her Dolly and putting her to bed has helped fill in a few frustrating hours.


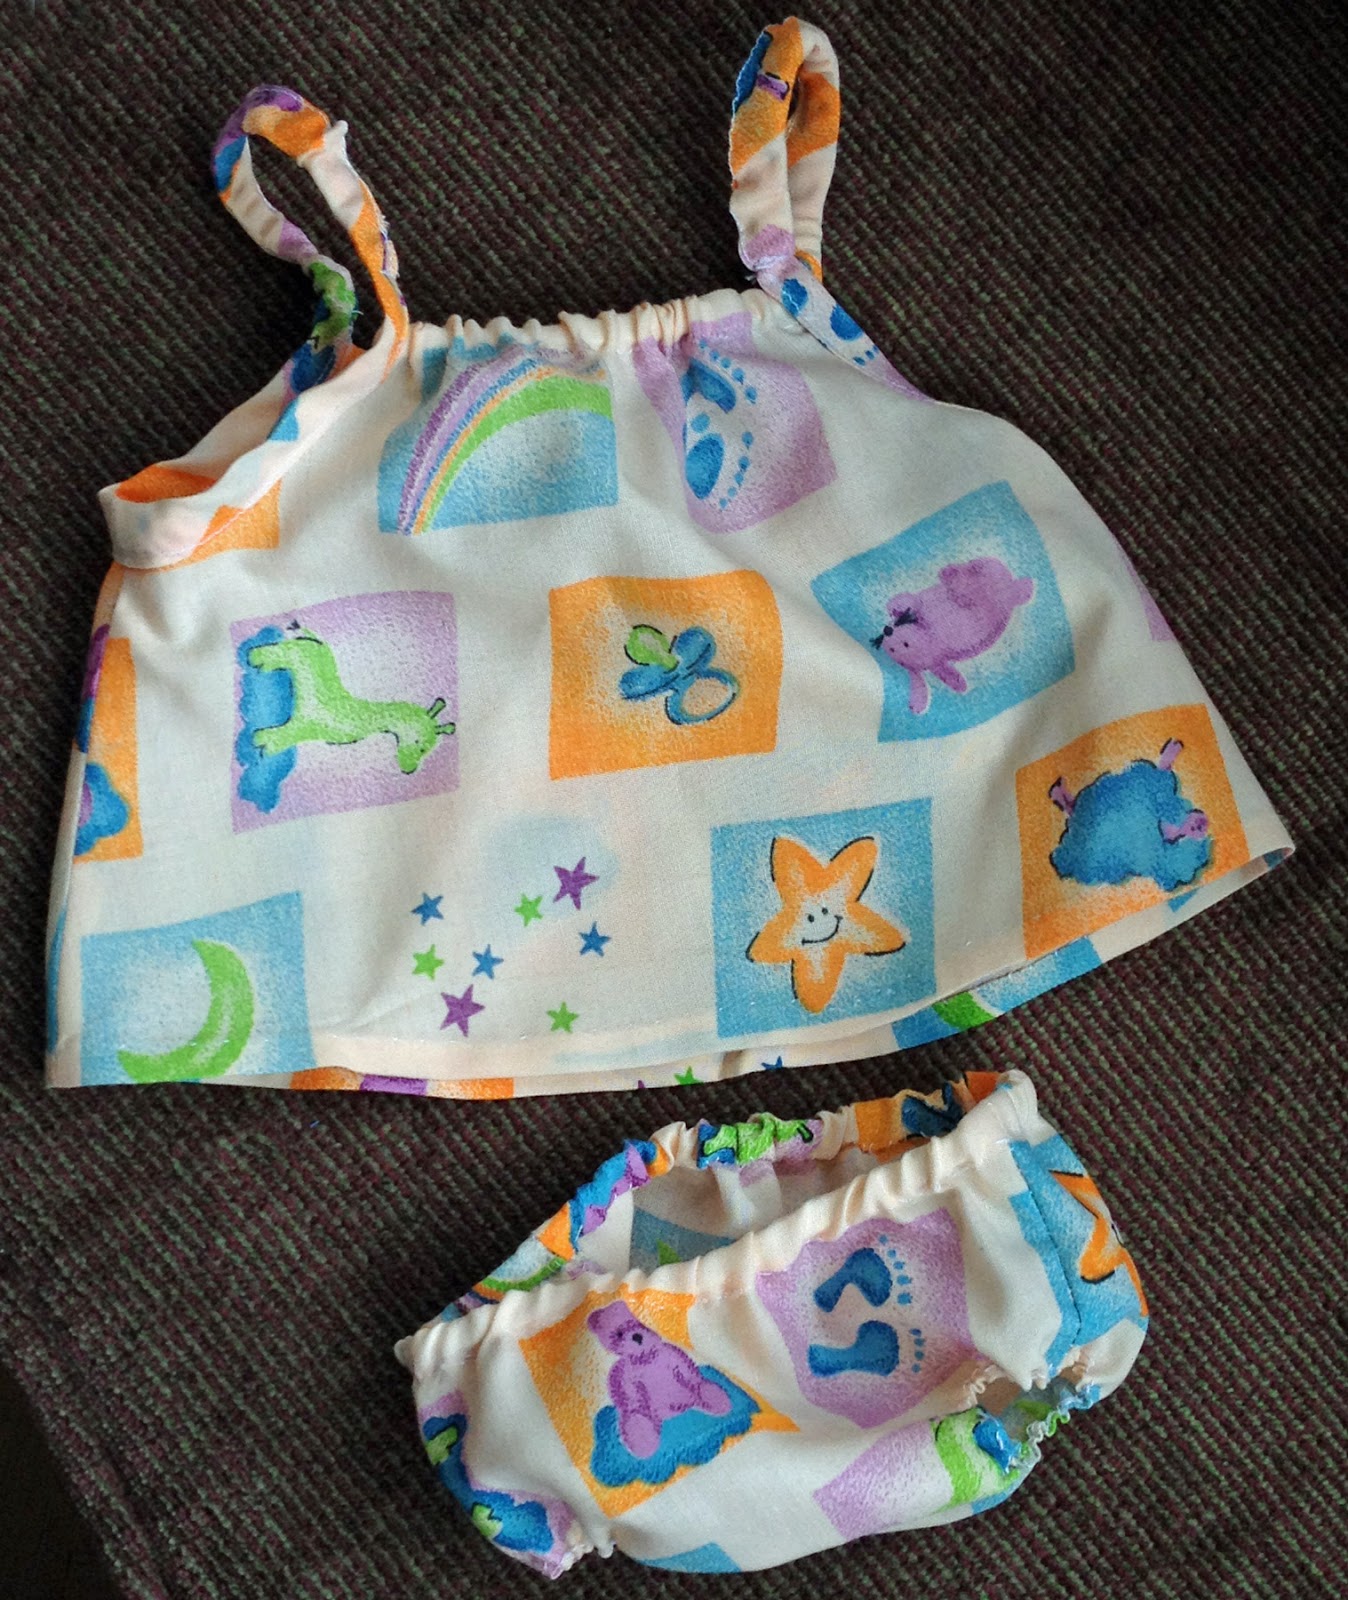
This outfit  comprises a little top or short dress, and a pair of knickers to match. I made a pattern, which is easy to copy, and I've written up how I made it up as a tutorial. It will fit a doll 15-16" - but it is quite forgiving and could easily be adapted. And they are ultra simple to make. To find out more - follow the jump!


Wednesday, 7 September 2016

Easy Doll's Outfit (to Match Tulip Dress)

I had some scraps of material left after making my grand-daughter a dress, and as she currently carries her dolly everywhere, I thought I'd make Dolly a dress, too. 
Back view:


Dolly's dress was so quick and easy to do, I thought I'd share how I made it. There are also matching knickers.

Friday, 5 February 2016

Finger Puppets

I've been trawling the internet for patterns or templates for felt animal finger puppets, but hadn't really found what I wanted. So I decided I'd make my own, and share them. It will take me a while to add all the finished finger puppets, so I'll blog about them a few at a time as they are made. Here are the first few, made for Easter:


A requirement for me is that the finished finger puppet should be recognisable as what it is supposed to be! I hope the ones above can be recognised as an Easter bunny, a chick, and a lamb. Here is my current wish list of some of the animals I'd like to make. I may add others if these go well.

Bear, Bee, Bird, Butterfly, Cat, Chick, Cow, Crocodile, Dog, Duck, Elephant, Frog, Giraffe, Hen, Hippo, Kangaroo, Ladybird, Lamb,  Lion, Monkey, Mouse, Octopus, Owl, Peacock, Penguin,  Pig, Polar Bear, Rabbit, Reindeer, Baby Seal, Tiger, Whale.

I chose animals my grand-daughters would be familiar with, either through personal experience, or through their favourite story books and toys.

I've got three main template shapes, plus some special templates. To find out more about the templates, and making finger puppets in general, read on.


Tuesday, 3 March 2015

Baby Gym

Baby Gym - A few ways to make your own


Our latest 'baby gym'


When our little grand-daughter was coming to stay, we wanted a baby gym to entertain her. It had to be simple, and also transportable.

When her mother and auntie, our daughters, were tiny, their Daddy had made them a very sturdy baby gym stand. Here's one of our daughters enjoying the very thing!


So we wanted to be able to provide something that wouldn't cost the earth, but would provide plenty of safe entertainment for the baby.
Below, I will write about how we made the Mark 1 version for our own daughters, other nice examples of home made baby gyms I found, and finally, how we made our latest versions for our grandchildren.