After I had made beach ponchos and hooded towels for the girls this summer, I still had a nice piece of fabric left over. This was a soft stretch towelling.

I thought there would be just enough to make something for the baby, and I had in mind that it reminded me a bit of a little romper suit my daughter had when she was about 16 or 17 months old - though hers was cotton woven fabric - coincidentally it looks a similar colour / design in the photos!

To find out how I made a romper for my grand-daughter, read on.


Now I look at it again, it would have been fairly simple to replicate this design, and maybe I'll do so later. Perhaps I'll use Dana's Perfect Diaper Cover pattern to make the knickers part, add just a little square bib front edged with bias tape, and a couple of straps. However, I didn't think of this soon enough - and from my pictures, I can't see exactly what happens at the back - I guess the straps cross. I'll come back to this later.
However, I found in my box, another of her little rompers, a bit ratty and worse for wear, but adequate to make a pattern. Here's my daughter wearing the original, a few years ago now! Why I still had it, I've no idea - it probably had a second existence as an outfit for one of her stuffed toys, and was finally too disreputable to send to the charity shop.


(I love the way she's copying Daddy blowing up a lilo. What a handsome young fellow he was - oops - is!)
So I used the tan-coloured original to cut a pattern, by folding it in half to make a front and a back. I cross-checked the back with Dana's pattern (mentioned earlier), and it looked pretty OK. I made some small adjustments to the length, and added seam allowance, then cut out the material on the fold. (This shows the wrong side of the fabric.)

I also cut a couple of straps, double the width of the tan-coloured straps plus 3/4" for seam allowance (i.e. 2 x 3/8"). I pinned and sewed them right sides together with a 3/8" seam allowance, and then turned them through with the aid of a safety pin.

I turned them so the seam would be in the middle of the wrong side of the straps, and over-sewed them down to stop them from twisting (while also finishing the ends).
Sewing them together was pretty straightforward. Look at Dana's Diaper Cover for a detailed explanation of how to make knickers / diaper covers. What I did was:
- Sewed up the crutch seam and side seams using a zig zag stitch (if you had a serger, you'd use that)
- Turned over and sewed all the hems about 1/4" and then another 5/8th" so I had roughly a 1/2" casing for elastic (leaving gaps for threading elastic)
- Threaded elastic through the knicker legs and sewed them up
- Threaded a piece of elastic, through one bib side down to the side seam, leaving a little sticking out at the top, round the back, and up through the second bib side. Again, I left a bit sticking out the top of the second bib side.
- I pulled it up firmly round the back (so it wouldn't gape), and stitched to the side seams
- Finally, I gently pulled up the elastic in the two bib sides just a little, to give them a bit of elasticity, attaching at the top and cutting off the excess.
Ideally, you'd want to try this with it on the baby to get the best fit, but then you'd have to be very careful about putting safety pins in the sides until you could take it off and sew it. I guessed, rather than risk stabbing her, on the grounds that I'd prefer to have to re-sew it if necessary!

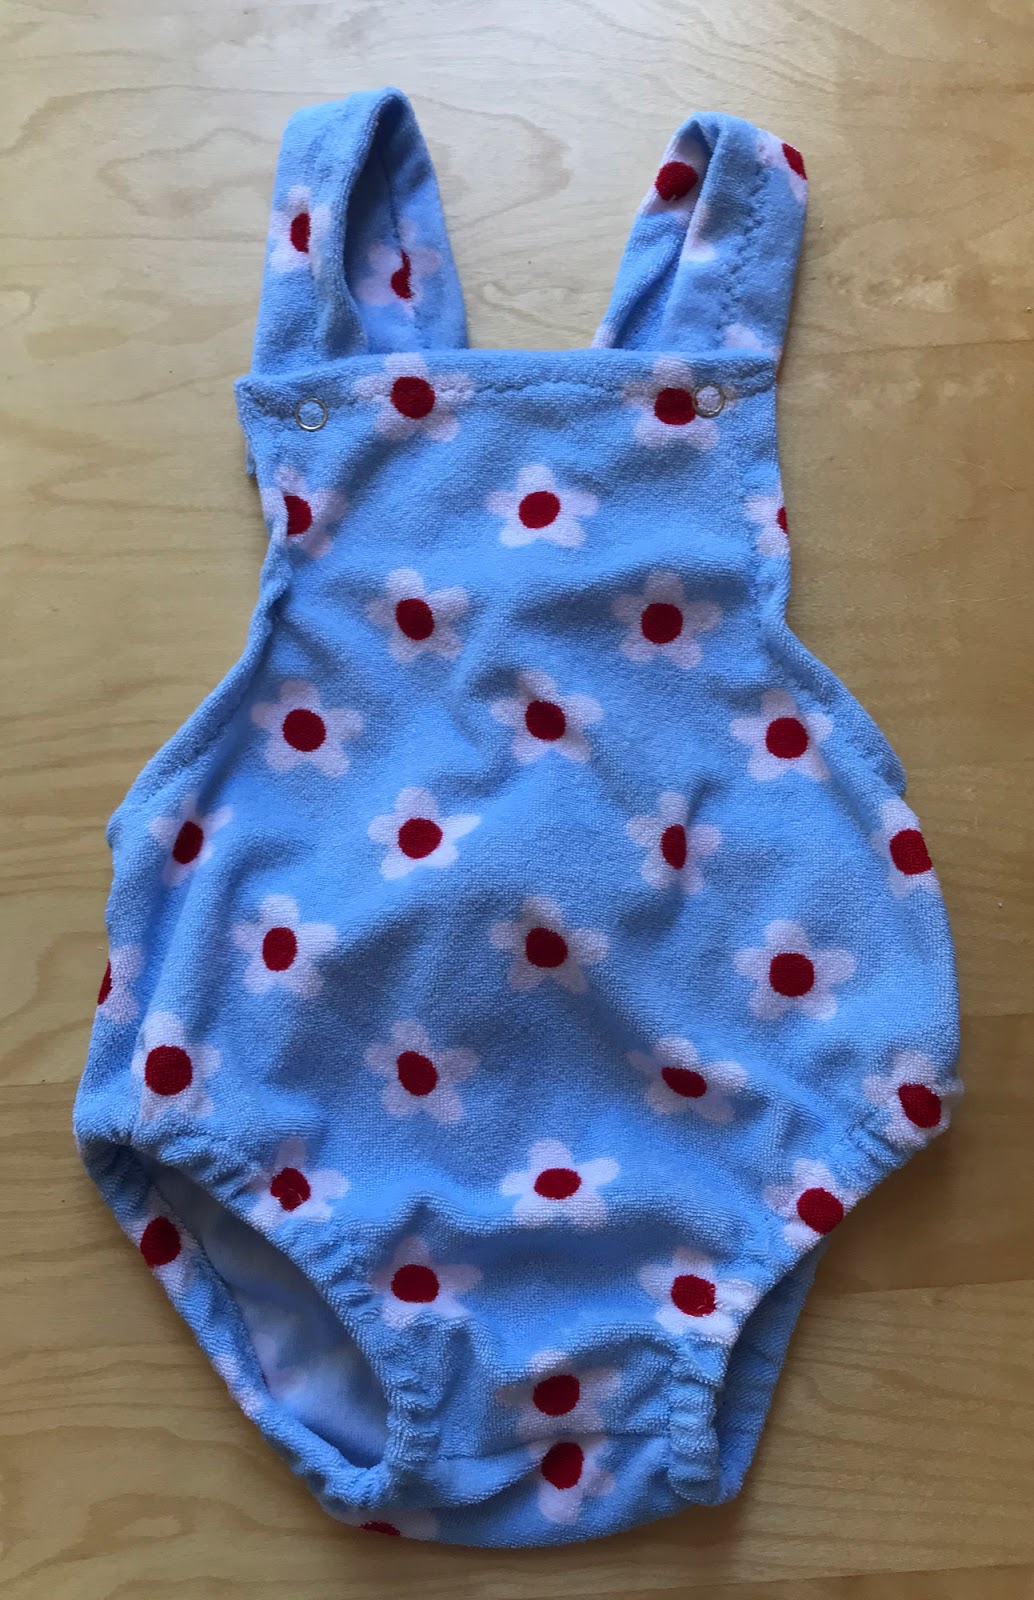
The final step was to add the straps, about a third of the way in from each side seam at the back, and slightly angled as they would cross over at the back. (Below, modelled on a stuffed rabbit. In case you thought this was my grand-daughter.)

I added snap fasteners at the front, with two on each strap and one on each side of the bib front (so they could be adjusted for length). The photos below were taken before I added the second snaps on the straps.

I promised I'd return to Dana's Diaper cover. Here again is the link to her free PDF pattern and tutorial. I've used it again and again to make knickers for the girls, and, by simply lengthening it upwards, also romper suits for little babies. However, if you didn't have a garment, as I did, to use to make a pattern, Dana's would work well for this type of bibbed romper suit, too. It would probably be even easier! I would make the knickers part as suggested by Dana, but keep the elastication to the sides and back at the waist, rather than all the way round. In other words, keep about 6" or so at the front flat. Then make a separate bib part (not gathered) between straps, and attach that to the ungathered part of the knickers. The straps will go over the shoulders and attach to the back waist with buttons or snaps. You can see what the finished romper suit should look like.
If I make some more using the Dana pattern method I will be sure to blog about how it goes.
No comments:
Post a Comment