I've used this pattern, Simplicity 9379, before, often making it with a knit bodice and a woven skirt (though it can be made entirely with woven fabrics). It's a flared but not fully circular skirt. One reason I like this pattern is that it has sleeves, and for Christmas in our climate, sleeves are pretty well essential. The other thing I like it that it's easy to embellish.
The one on the left, for 5 year-old Rose, has a knit top and sleeves. Hers was made in size 7, but with an extrra 1" (2.5cm) added to the bodice length, It's fully lined apart from the sleeves, with a satin-y lining. The sleeves have been shortened to three-quarter length to allow for the addition of semi-circular cuffs, and the cuffs are also lined with the same lining. The skirt is 100% cotton with a tiny pattern of Christmas bows, but there are several layers of red tulle between the outer skirt and the lining. (You can just about see the tulle peeking below the skirt.)

First a couple of points about Rose's dress. I've mentioned the lined cuffs. You could add cuffs like these to any pattern with elbow or three-quarter length sleeves. I measured round the finished size of the bottom edge of the sleeve, and added a small seam allowance. (About 3/8" or 1cm either end.) Then I drew a rectangle with this measurement across the top, and the length I wanted the cuffs down the side (again plus seam allowance top and bottom). I marked some lines down the rectangle - they were probably about 1" apart, but the exact size doesn't matter as long as they are even. And I cut the lines from the bottom to just below the top. You can see in the picture below what I then did with my slashed piece of paper. I stuck it on another piece of paper and spread the cut pieces evenly apart to make just over a semicircle. And drew a curve round the top and bottom by eye. This is known as the Slash and Spread method, and I use it loads. Then I cut two linings and two outer cuffs using this pattern.

I sewed each cuff and lining right sides together, just round the bottom curved edge. And clipped the curve. I turned it the right way out to press the curve nicely. Then I opened it out again, and pinned the right sides together of the cuff sides, and the lining sides, and sewed it as one continuous seam. I'm sorry I didn't picture this step. It's a slightly bendy seam but not too difficult to do. Then pressed those side seams of the cuffs.
You could, if you chose, attach both layers of the cuff together to the sleeve bottom, and especially if you had a serger. I prefer to completely enclose as many seams as possible, as all my granddaughters dislike 'itchy' seams, so I first sewed the outside edges of the cuffs to the sleeves right sides together, and then hand-sewed the linings over the seam.
This is the nearest I got to taking a picture of the finished cuffs.
This dress also had a Peter Pan collar (made with the skirt fabric, and lined with the same lining). I hacked the collar pattern a bit so that I would have a neat edge to edge collar. Quite why I used a wider seam allowance on the neck curve I can't quite remember. If it comes to me, I'll update this!
What I chose to do with the skirt was probably a bit more fiddly than usual. I wanted to use some red tulle that I had, between the skirt and skirt lining, to give it a bit more 'puffiness', But it was in pieces, so I spent quite a bit of time sewing bits of tulle together so that I could do 6 separate layers of tulle.
In the picture below, I've clipped the outer skirt and the dress bodice right sides together, and then the tulle on top of the dress bodice. I tacked all these layers together first. Then I flipped the skirt over so that I could make a neat job of hand-stitching the small opening in the skirt where the zip would be - I didn't want bits of tulle getting caught in the zip. The skirt lining was separately attached to the bodice lining, but I overstitched the waistline to ensure all the raw edges were encased in the bodice lining.
And she seems happy with the end result.
Her sister Fleur, who is 7, has never been a frilly girl, in fact it was only recently she could be persuaded into a dress at all. But she likes tartan, and she likes smart. Her dress was from the same pattern, and was also fully lined bar the sleeves.The only embellishment on her blue tartan dress is the fake placket at the front. That's as far as I can go with decoration for her. I'll explain this feature below. Hers was made between the size 8 and 10. Seeing how it fits I think I should have gone straight to the size 10, but it's fine for this year.
In many ways, this was a simpler make than the red dress. For a start, it was all woven fabric, so no easing to fit at the waist, and no cuffs, no tulle. But as you can see, much more of a challenge for pattern matching. I must say, I'm always very happy when I can match patterns well! I was pretty pleased with this.
The picture below is before I'd pressed the zip, but again, I hope you'll agree I did a decent job of the matching? You'll also see in this photo that I made a little satin button loop to hold the top of the zip together neatly.
So now I'll explain how I did the only fancy bit on this dress. She had liked the fake placket idea I had added to her Christmas dress (a different pattern) two years ago. If you like this feature, I suggest you have a look at my earlier post, when I go into more details about it.
This time, I used some satin double-fold bias tape, which was the only fabric I had that was a really good match. I steam-pressed the bejesus out of it to try and get rid of the original fold lines. Then pressed some stiff iron-on interfacing down the middle, leaving a bare 1/4" margin to turn under. As it was still a bit keen in springing back to its original shape, I hand-tacked the edges under.
Before I sewed it on, I sewed three little buttons on the front. And then attached it, lining it up with the checks of the tartan. The over-stitching nicely covered the original fold lines of the bias tape. Then I used some more of the satin bias binding to make piping, which was inserted between the bodice and the lining.
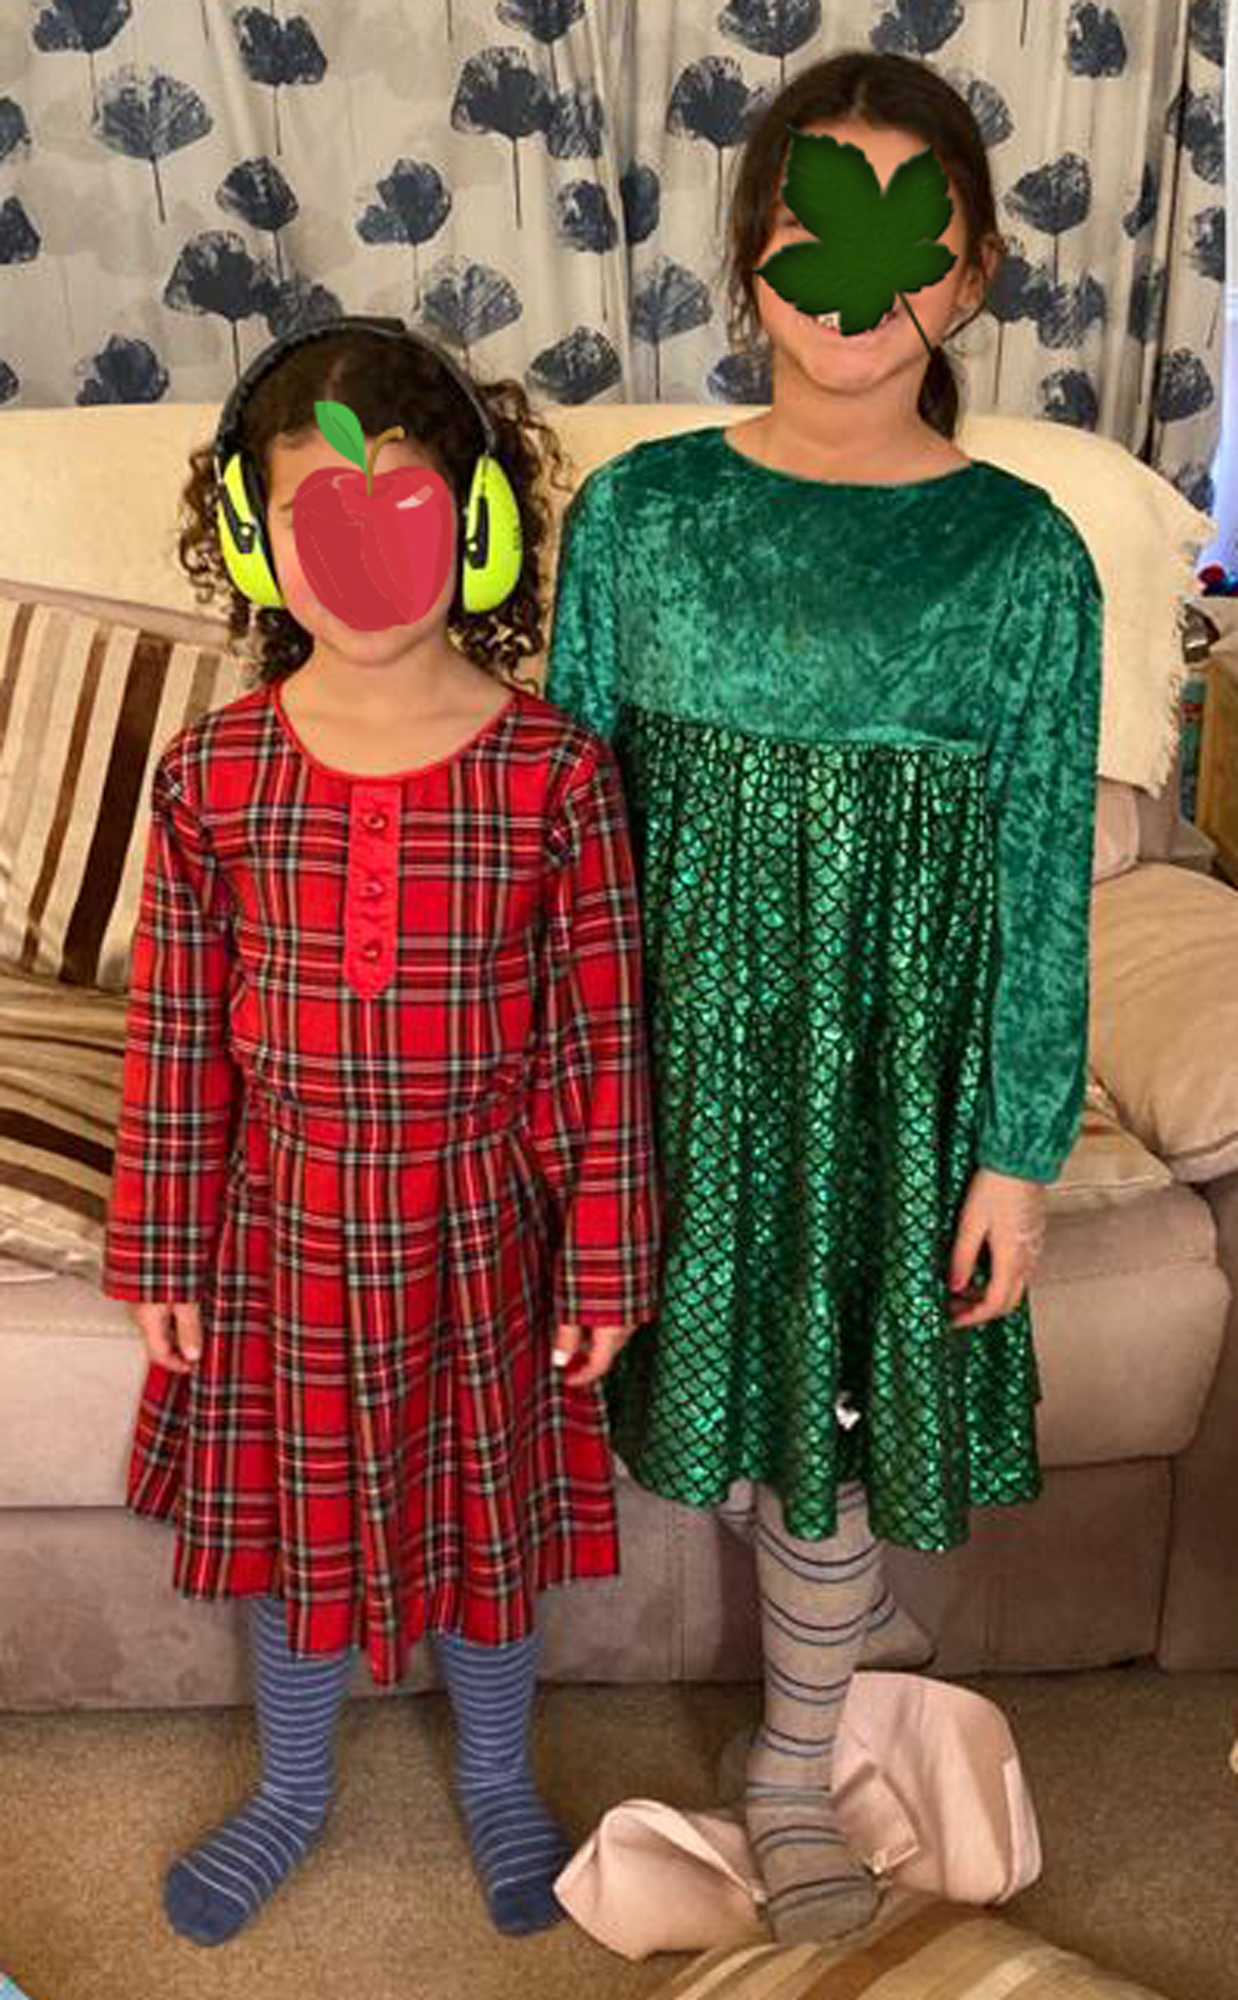
Now all I'm waiting for is to see pictures of the girls together in their new Christmas dresses. You'll have to make do with them on Christmas Eve, wearing different dresses. In fact, Rose is wearing her older sister's outgrown Christmas dress from 2 years ago, the other one with a fake placket. It still may be a little large for her. And Fleur is modelling a dress that was a special request. This dress refusenik so liked one of her younger sister's and cousin's twirly dresses that she asked for one too, for her birthday.


No comments:
Post a Comment