
However, there are a number of nice free patterns for T-shirt style tops available. Some with envelope necks, which I think are great for young ones, especially at bedtime. I'll do a whole post on free T shirt patterns one day.
The trousers were from the Jereli pattern, which you can find details of here.
You can find out more about the making of this set of pyjamas after the jump.
This time I'll start with the trousers, because they were similar to the ones I made for Fleur, here. (And, the top was not from a free pattern.)
Here's the Jereli pattern used to make the trousers. I've used it a few times, so you can tell I'm a fan. Thank you, Jereli.

These trousers for Rose were a little bit different from Fleur's, though. The fabric was thinner (both the main fabric and the contrast fabric, which as you can see was plain pale blue). So I decided to revert to making these fully reversible. rather than one layer with turn-ups, like Fleur's. Here are the cut out patterns pieces, with the pattern.

To make them reversible, I used the Shwin and Shwin method that I've used before in several projects. For example, the first PJ pants I made for Jane. Note that it's the method of making pants reversible I used, not their pattern, which is for knits.

(The picture looks a little odd, because I took it vertically, from one end, and turned it horizontal to better fit the page. So the perspective has been lost. Both plain and patterned layers are in fact the same length. If you turn your head down to the left to look at it sideways, it probably looks OK. Don't say I don't give you some exercise while you read my blog.)
The Shwin and Shwin method joins the two layers at the hem, then uses one long seam from top to join and to the other top. Above, that seam is pinned ready to sew. The crutch seam then has to be sewn in two halves, from the back (or front) waistband to the crutch, and from the front (or back) waist band to the crutch.
However, this time, I did want to add the tabs to hold the turn-ups up, like I'd used on Fleur's pyjamas, the idea for which I'd found on Birch Fabrics / Jess at Craftiness is not Optional.
So before I sewed the hems together, I made little tabs, much shorter than on Fleur's PJs, because these were going to attach to the end of the turn-up, not the point where the turn-up joined the trouser bottom. The first picture shows (on the right) one of the tabs sewn inside out, with some iron-on interfacing to reinforce it, with the seams and corners trimmed. On the left, the tab has been turned right side out with the aid of blunt scissors, and pressed.

Now, here's a thing. Normally I steer a million miles away from anything that requires me to make button holes. The idea of going to all the effort of making a whole garment, only to ruin it by making disastrous button holes, is enough to deter me, normally. However. You'll notice that these tabs haven't yet been attached to the garment. So if I messed up, I wouldn't ruin a whole garment, just the tab, and I could easily make another tab. I figured that if I was ever going to be brave enough to attempt the dreaded button-hole, now was it! And guess what! They worked, both of them, so I didn't even need to remake a tab. Of course, they wouldn't pass muster as remotely professional, but I was pretty pleased with them for my grand-daughter's pyjamas.

This time, I sandwiched my button-holed tabs in between the right sides of the fabric before I sewed the bottoms of the two layers together.

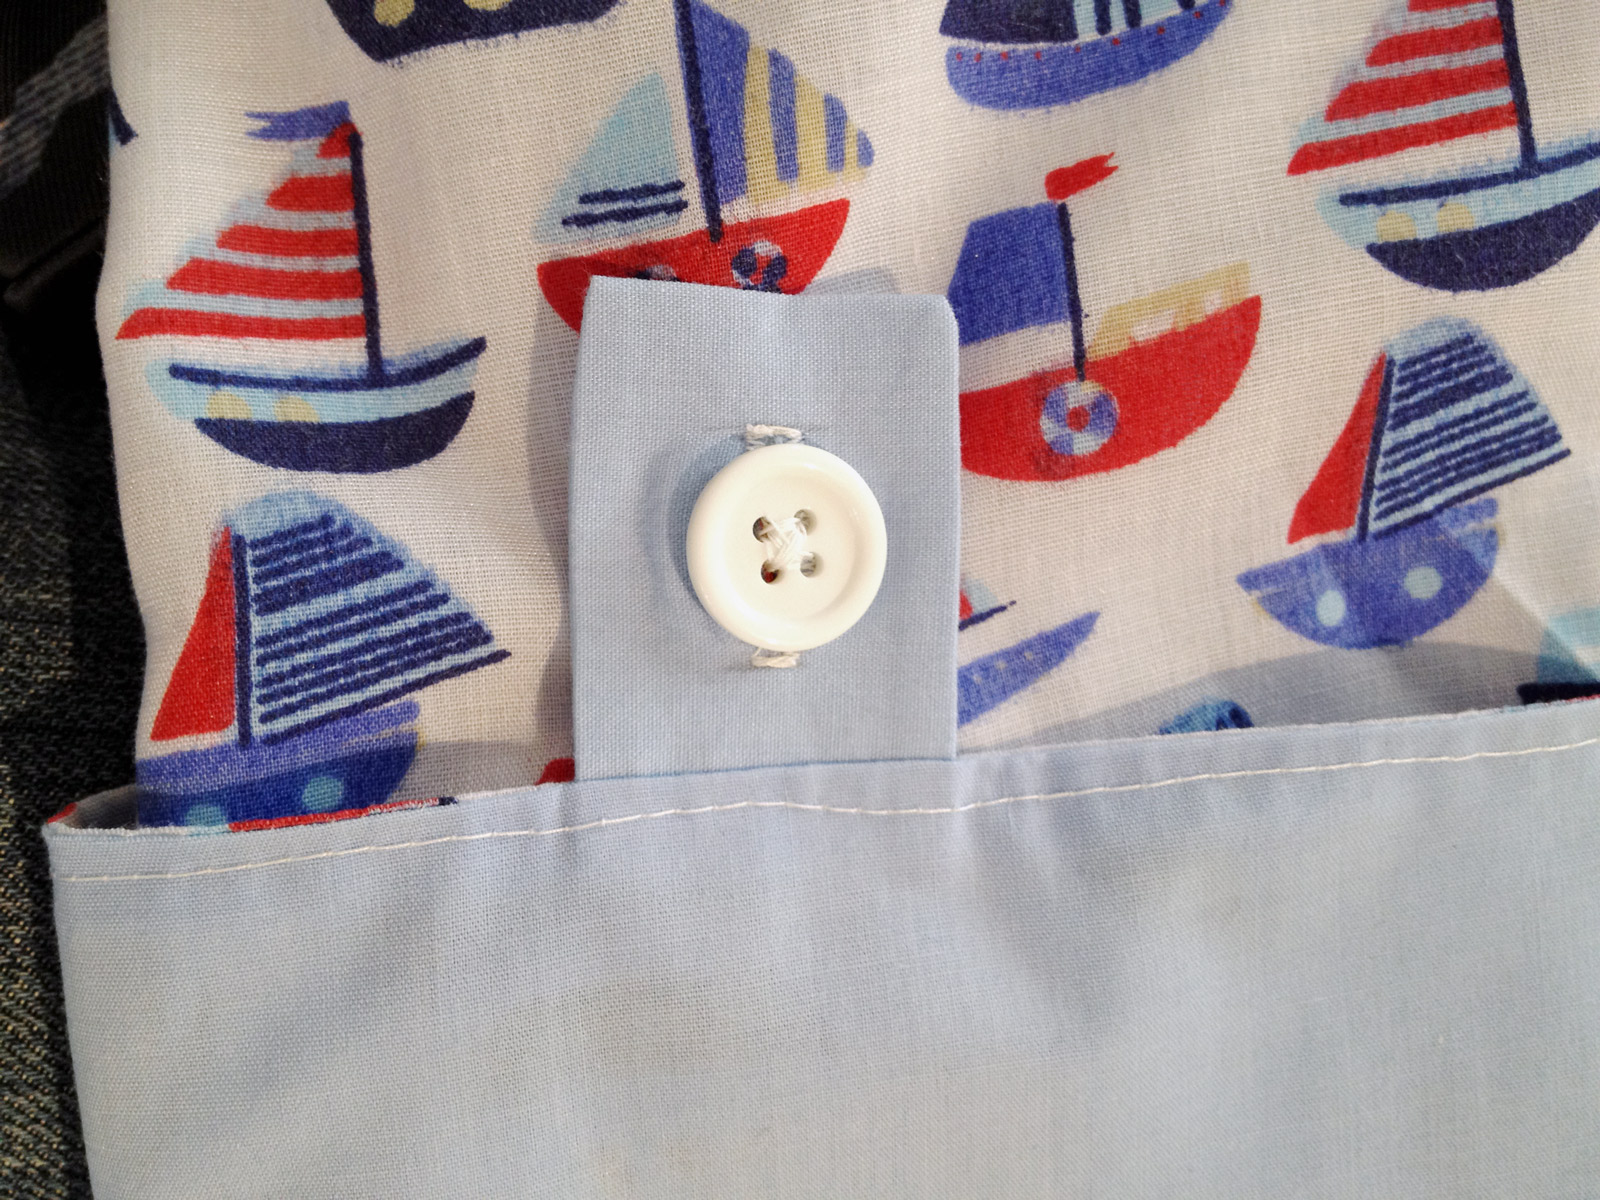
I also ironed on strips of iron-on interfacing between the two layers to reinforce where my buttons would go. Here's the finished tab, buttoned-up.
A final point on the Shwin and Shwin reversible trousers method, which I've outlined above. I've found that the easiest way of completing the waistband is to press the top hems towards each other where you want the top to be, then pin and sew a lower waistband seam about an inch to an inch and an eighth below the top. (Pinned as below.)

I then sew a seam all the way round just below the top, leaving a channel wide enough for my 3/4" elastic, and leaving a gap in that seam to thread the elastic through. Having fitted the elastic to the child and sewn the ends together, I then just finish by sewing up the gap.
Now, remembering that these are to be reversible, a second's thought tells you that you need two buttons for each leg, one on each layer.
So I sewed identical buttons both inside and outside the trousers. I probably should have sewn another set lower down, or higher up, to allow for different levels of turn-up. However, by this time, I'd already sewn four buttons. (As well as two button-holes - yes, I will keep mentioning the button -holes!) I figured that was enough, and anyway, Rose was ready to wear them. At least I was able to get a picture of them on the washing line both ways out before she got them on!


If she needs a different level of turn-up, I'll just have to move the buttons, which is what Jess suggests to do.
Now for the top. I mentioned that I used a bought T-shirt pattern, from Burda. I don't go to the expense of using a bought pattern if I can help it, when I have three children to make for. But I must have bought this half-price at some stage, and it had been hanging about for some time in my box. So I decided to give it a whirl.

Here, on the pattern envelope back, you can get a better picture of the style. It opens on each shoulder, with buttons or press-studs / snap fasteners. You can guess which I opted for. (Did I mention I'D ALREADY MADE TWO BUTTON HOLES for this project?)


If you are wanting something similar to this design, there are several free patterns on the internet for T-shirt tops, for example from Small Dream Factory (there is more than one style, this is just one of them); from Melly Sews, or from Once Upon a Sewing Machine.
Thanks to all of these people who are generous enough to provide free PDFS.You'll also note that I made an appliqué for the front, to tie the nautical theme in with the trousers. This was a very simple hand-drawn design, two triangles and a trapezoid. The fabric was rib knit in red and white. As the T-shirt material was stretchy, I didn't want to attach something non-stretchy. I zigzagged round the pieces to attach them. (You can also read more about making home-made appliqués elsewhere on my blog, here and here.
Here's the finished pair. Now to ask Rose's Mummy if it's possible to get an in-wear photo. But she has pointed out that trying to get a photo of a 15 month old younger child in the bedtime maelstrom is maybe asking a bit much! So you may have to be satisfied with this.
No comments:
Post a Comment