


I did a couple of posts on designing templates for and making finger puppets earlier this year, and since then I've been making a few more. The children, especially little Jane, like to play with these atop a dolly peg (in lieu of a finger). This is what I call a dolly peg, in case you don't know. My mother used to use these to peg washing on the line, but you can still buy them.

When I picked her up from nursery this week, she randomly picked out a monkey and a penguin from my box of finger puppets, and had them chat to each other all the way home as she rode in the buggy.

She was intrigued that Monkey has a tail, and Penguin does not. You can see Monkey and Penguin, lower down on this post. If you'd like some other ideas for children's finger puppets, or how to make your own, read on.
The first set I ever made, which was the subject of the earlier posts, was an Easter set, comprising Chick, Rabbit and Lamb.

You can find a lot more about making templates for finger puppets here. And more information on the Easter set here. But I'll also describe in some detail below how I made a set of ducks.

I followed the Eater set with some Arctic and Antarctic animals, namely a Seal, a Polar Bear, and a Penguin. As before, these are all made of felt, to my own designs.


Soon enough, I'd written another story about these animals, which also involved a Whale. So then I had to make a whale. (Are we starting to see a pattern here?)


In the story, the polar bear hitches a ride on the whale's back. (You'll understand why, when I eventually post the story.) So here he is riding on the whale's back.

There are other stories that have followed, with corresponding animals. All of the following appear somewhere.
(Looking at him again, it looks to me as though I only gave him whiskers on one side of his muzzle. Have to add some more. But I need to add some paws, as well - the story he's in requires it.)


The most recent project was making a whole bunch of ducks, It was quite a challenge ensuring they don't look the same as the Chick (above). In fact most of the finger puppet ducks I've seen on the internet do look more like chicks. I think the main distinguishing feature is that ducks' beaks should be round rather than pointed, and their feet are webbed, not claws. In fairness, most of the ducks and ducklings my grand-daughters see are mallards, or the occasional Mandarin duck, so are not yellow at all. However, the bath ducks they play with are mostly yellow, and I didn't really want to make the baby ducks dull boring grey-brown ducklings. What a lot we ask of babies learning the cope with the world, when we point to a Mallard duck on the pond, and to a cartoon duck in a book (or Donald Duck in a film) and to their bath ducks, and we tell them these are all ducks.
This time I wanted to make 5 ducks all the same. (Actually there are only 4 in my story, but there are 5 little ducks who went swimming one day, so I thought by having 5 we could do both. Mummy Duck who said "Quack, Quack, Quack, Quack", is a cute bath nail brush.) So I went into mass production. The key to mass production is to keep things simple.
Materials:
- Pale yellow felt,
- Scrappy bits of bright orange felt
- Yellow sewing thread
- Orange sewing thread
- Black embroidery thread.
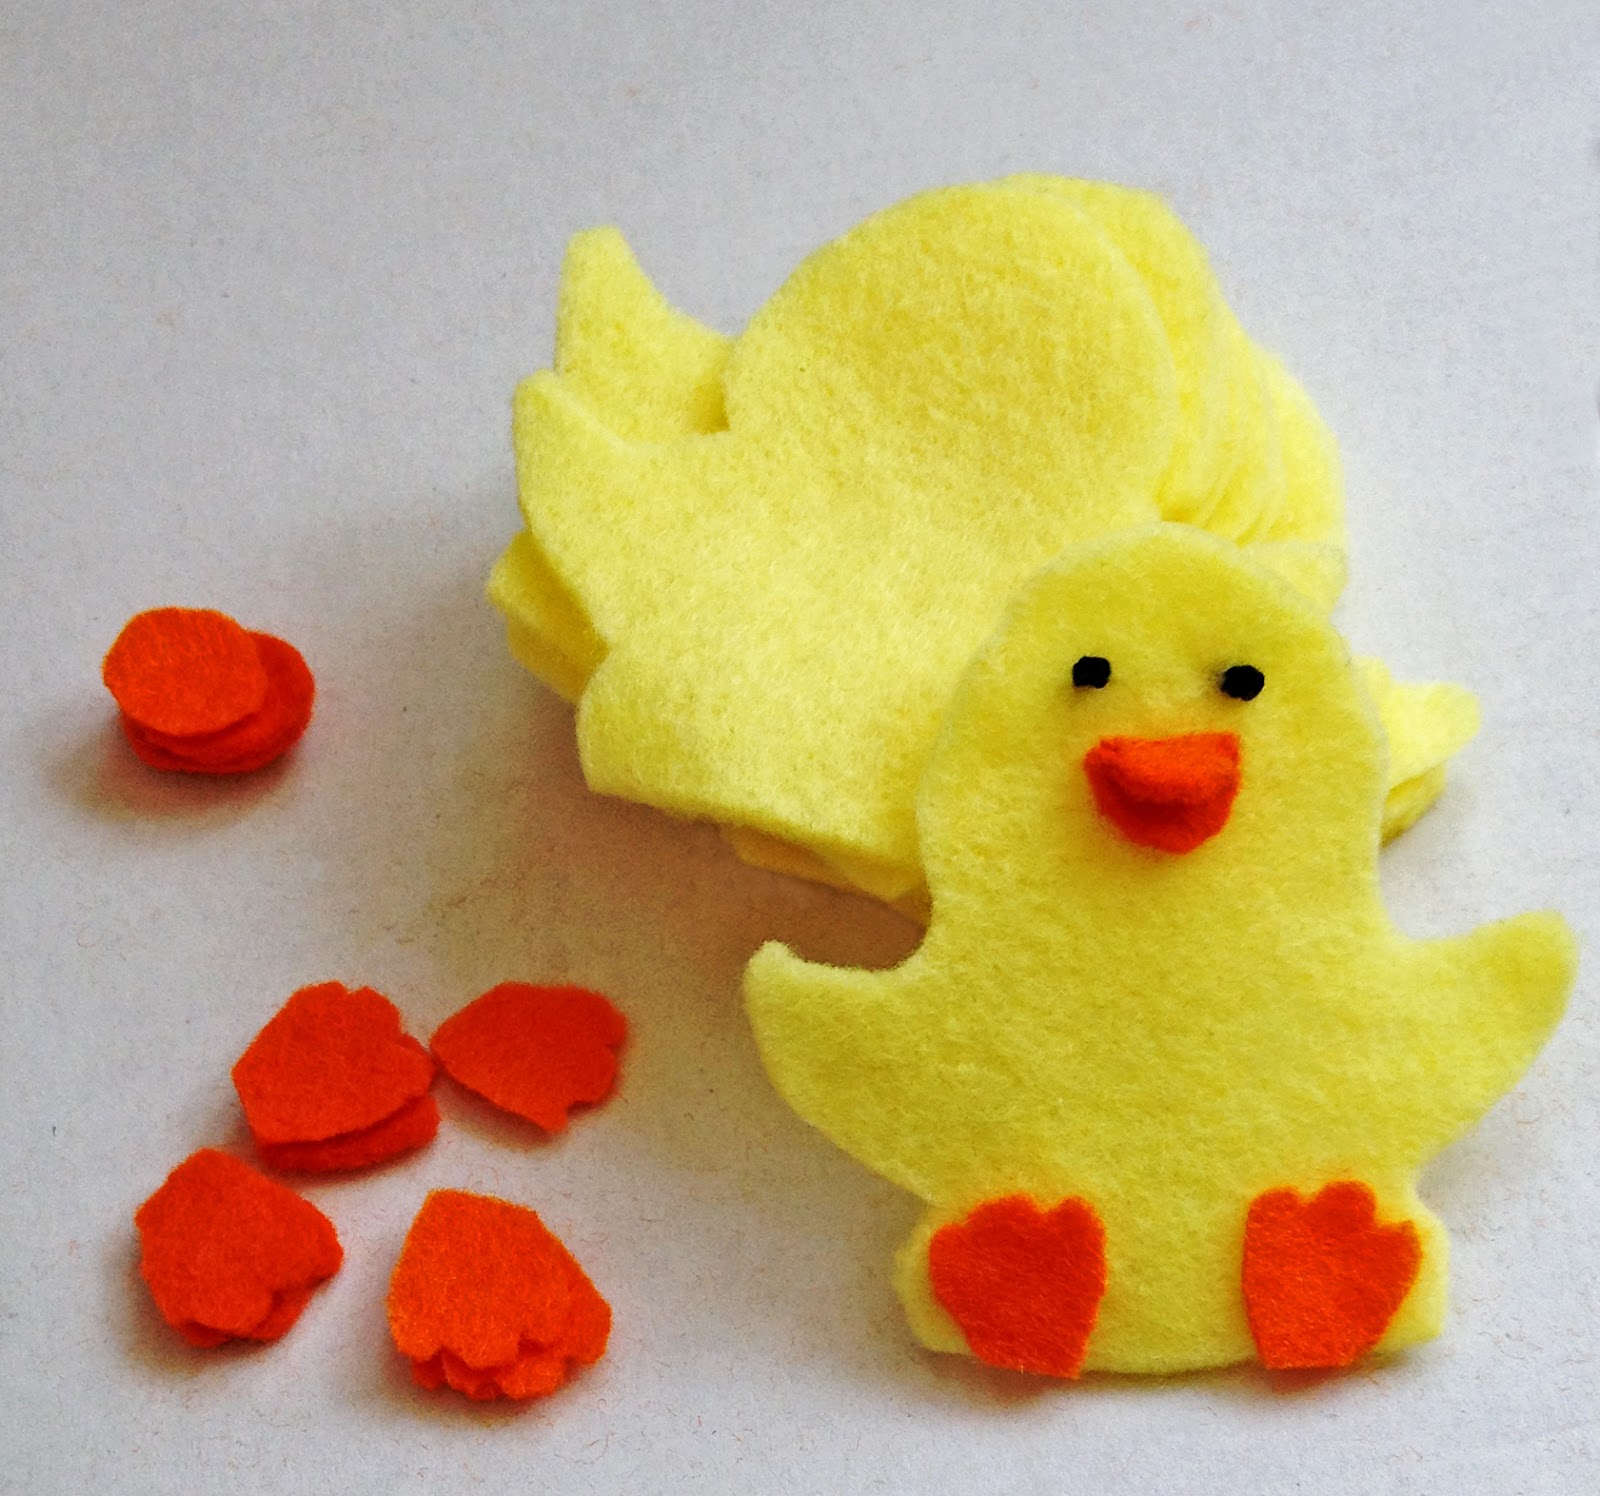
Here are 10 bodies (back and front), 5 beaks, and 10 webbed feet cut out ready to sew.

The beak is just an egg shape, with the smaller end upwards. I first back-stitched slightly above halfway up the egg, so the top beak would be slightly shorter than the bottom beak (picture below). I stitched right through the front layer of the body only.

Then I folded the beak together,and stitched it closer together at the back where it joined the body, especially at the sides. You can see the effect of this below, with the first duck's front completed.
I drew a webbed foot just on an angle to vertical, and cut 10, so to make pairs, I reversed 5. (If your felt was obviously one-sided, you'd have to cut 5, then reverse the pattern to do the other five, but my felt was pretty much the same on both sides.) I loosely tacked these to the body all the way round. I didn't worry about this too much, as they were soon going to be joined more firmly at the bottom.
The eyes were just two French knots using three strands of black embroidery thread (i.e. I split the 6-strand thread). If you don't know how to do French knots, there are numerous tutorials on the web, for example this one from WikiHow. For tiny eyes etc, I use three strands of thread and wind the thread 3-4 times round the needle.
Doing them all together was actually pretty quick (I'd say the pattern making and cutting out took the longest time). So, I soon had 5 duck fronts ready to put together as puppets.

Before I attached the fronts to the backs, I zig-zagged the bottoms on my machine. I was actually very short of the yellow sewing thread, it's just what I had left, and there wasn't time to go to the store. So I link stitched them, in other words, I just kept feeding in ducks, front, back, front, back, etc., without stopping, cutting threads and restarting. This saved a lot of thread, and also had the advantage the fronts and backs were already loosely attached to each other. I just snipped them into pairs, you can see the first pair detached. I think you can just about see the zig-zagging at the bottoms.

This means the zig-zagging is not very finished at the ends, but it doesn't really matter, as you will oversew the ends when you sew backs and fronts together.
(You can skip the step of sewing the bottoms of finger puppets if you are using felt, it doesn't fray like woven fabrics. However, I prefer to sew the the bottoms, eithr by zig-zagging or button-hole stitching by hand, to give a little bit more strength for wear and tear. It does also make it a bit easier for a small child to open it to put it on their finger or on a dolly peg.)
The final job was to take each of the pairs, putting the front on top of the back, and zig-zag all the way round the outside (except the bottom, of course), thus attaching them and forming a finger puppet.
Here are the finished duck finger puppets in a little plastic bag, to keep them clean, ready for story time.

No comments:
Post a Comment