

To find out more, and get the pattern link, read on.
I came across the Life Sew Savory pattern, because I really wanted dresses with sleeves for my grand-daughters' Christmas dresses. There are lots of lovely free party dress patterns, but most are sleeveless, which isn't a lot of good in our climate in winter. The Sweet Rose pattern fitted the bill perfectly. I've used a lot of Emily's patterns, so I was confident this would work.
The green one above was the first I made, for Ada, 2 and a half, for Christmas. She loved it, - and so did one of her cousins, whose 5th birthdaywould be in January - so guess what she got for her birthday!
First, the green one.

I had bought this gorgeous fishscale (let's call it mermaid scale) fabric specially for the dress. It's fairly horrible stuff to sew, because as well as the marked black line 'scales', the whole fabric seems to be made up of tiny little scales. But I found it worked reasonably well if it was only sewn from the wrong side. I even dealt with the hem by attaching some bias tape and then hand-sewed the hem. To be fair, it's a small dress and the hem isn't very long - it was just a gentle sew in front of the TV one evening.
So - to cutting out and making up the pattern. I particularly wanted to use up the remains of some green stretch velvet I had left over from another project for the bodice and sleeves. Becuase of the stretch, it's quite forgiving size-wise. I used the size 3 pattern to allow a bit of room for growth. The fabric I had left available was very little for this pattern. It might not have been had it not been velvet, with a nap, so I had to make sure all the pattern pieces were the correct way up - I couldn't just do some upside down.
I had to do two folds on the fabric, one on the scrappy right hand bit, for the front bodice, and the other, to get two mirrored sleeves (cut close to but not on the long left-hand fold). That left me with a very narrow piece to get the two back bodice pieces. I cut one out, which would be the right back bodice, next to the sleeves, where I could just get the wider side part below the sleeves. (You can see how close to the edge I was on the centre back seam.)

I then reversed the pattern (still attached to the right back bodice) next to the front bodice, and just squeezed it out. Phew!)

Now, I didn't bother with a neck facing, because I intended to fully line the bodice (not the sleeves). I also had some green lining left over from the earlier project, mercifully enough to cut out a lining without too much wrangling. I like lined bodices, and by fully encasing the neck, bodice-to skirt-seam, and sleeve-to-bodice seams, I avoid having any 'itchy' bits inside. All my grand-daughters have some degree of sensitivity aroung their chests to what they describe as itchy seams.
So after sewing the shoulder seams of both the bodice and the lining, I attached them together at the neck, by sewing them right sides together. (In fact, I sewed from the bottom of the centre back, right round the back, and down the other back bodice to the bottom. What I didn't do was go back and forth at the beginning and end of this long seam, because it is helpful to have a bit of looseness at the bottom when it comes to attaching the skirt.)
Next, I pinned the sleeves to the still open armholes - this earlier post shows what this looks like on another dress. The design of the sleeves I like very much. Instead of having to do a lot of gathering at the shoulder, there is provision for a small pleat, much easier to do. Then I sewed the side seams, from the bottom of the bodice right across the sleeve seam and down the bodice lining. And I made the cuffs, with a bit of elastic in.
(You can find out how I attach the lining armholes to the dress in this same post.)

Then, there was just the skirt to gather and pin to the outer bodice. Once that was sewn, I pinned the bottom of the lining under. Often, I hand sew linings in, but in this case I was lazy and over-sewed by machine on the outside. Actually, it's not just laziness, This does hold the gathers nicely in place, pressed up into the bodice.
I hate doing button holes, so I put hammer in snaps down the back.
To get the full tutorial, see the Life Sew Savory post. (Though note hers is not a lined bodice version.)

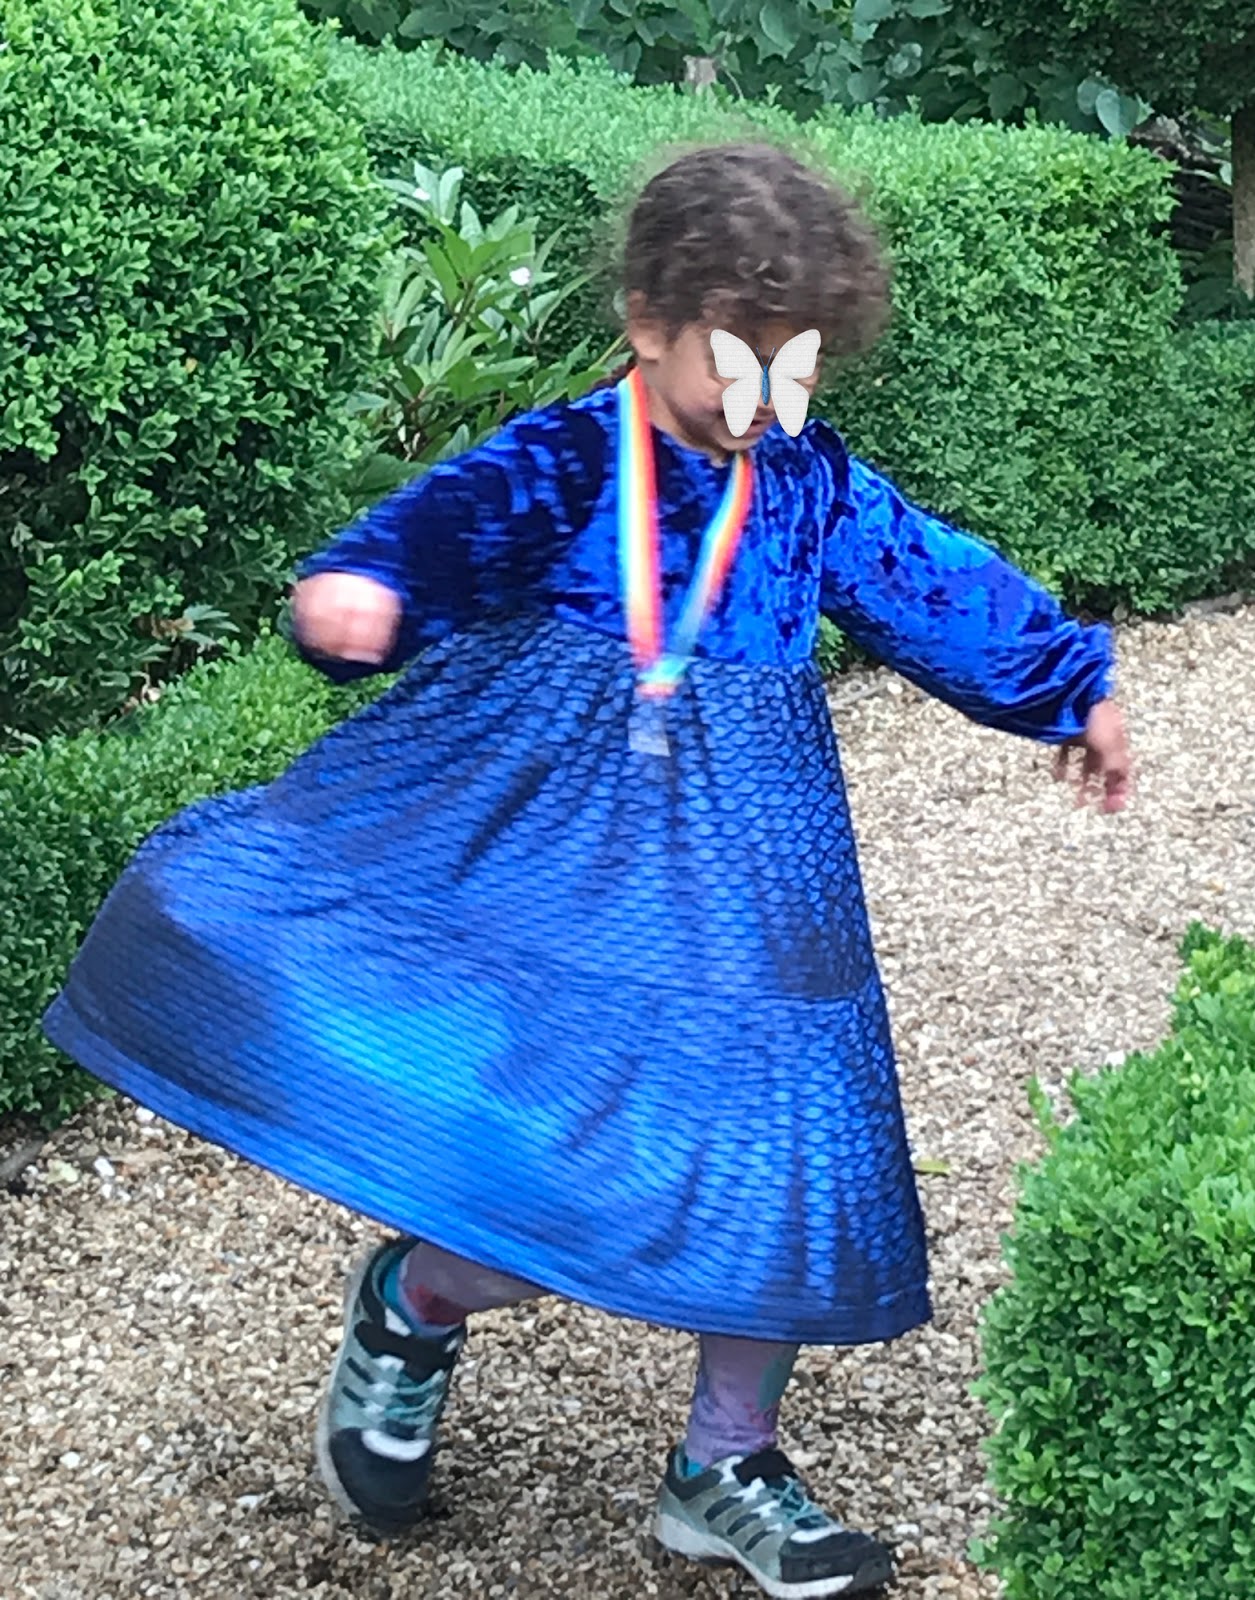
Was this a success? I think you can fairly say so! Here are all the girls in their Christmas dresses. They all loved their own dresses, but they all also loved Ada's little green dress - especially Rose, far left. It was pointed out to her that maybe it was because it was so tiny that she thought that dress was cute - but she still loved it. She does love her rainbows and unicorns dress, too, and wears it a lot - but with a January birthday coming up, I thought there was an oportunity to make her a Sweet Rose dress, too.


Lots of great spin! So now we have a double-happy Rose!


And now elder sister wants one, too! Off back to the fabric store, then!


The interesting thing is that her older sister, previously a complete dress-refusenik, had taken no notice of this dress until she saw it spin.


No comments:
Post a Comment