And just at the right time, I happened upon a post from Steph Sanna (thank you so much, Steph) with pictures of how she had made the Speedy Pants from Made By Jacks Mum into training pants. Perfect. Thank you also to MJBM for the awesome free pattern. (If you'll follow that link, you'll see there is a price attached, but if you subscribe to MBJM Facebook page and newsletter, you can get a code to get the pattern free.)

For more information about converting the pattern into training pants, read on!
, the Speedy Pants are made in two pieces, plus a gusset. Front and back, as seen below. There is one advantage in making pants in two pieces: you can have the pattern the right way up on both front and back. If you cut only one piece from a directional fabric, the pattern will be upside down on one half, and you have to decide - front or back? In Steph's quick method for making training pants, she overlapped the pattern pieces so she could cut just one piece. I used this method later on, but for the first pair with these little ponies, I decided to stick with the two pieces so all the ponies were the right way up. And then joined the back to the front.

Steph made her training pants by skipping the gusset in the original pattern, but making a full lining layer, and two shaped inner layers, one of fleece, for a little absorbency, and one of PUL, to help a bit with leaks. I didn't know what PUL was, but Steph explained, and I managed to find a source in the UK. This was from Toby and Bee London, selling on Etsy. PUL is rather an expensive fabric, as it is semi-waterproof, but I was able to buy from them some small offcuts which was plenty for the small amounts needed. These were patterned. Plain would have been fine, as the PUL is hidden, but at least I could see which side was which! Steph said these pants were not intended to be fully waterproof. The idea is that they avoid major spillage, but hopefully the toddler feels the damp patch in time to say - Mummy, I need a toilet!
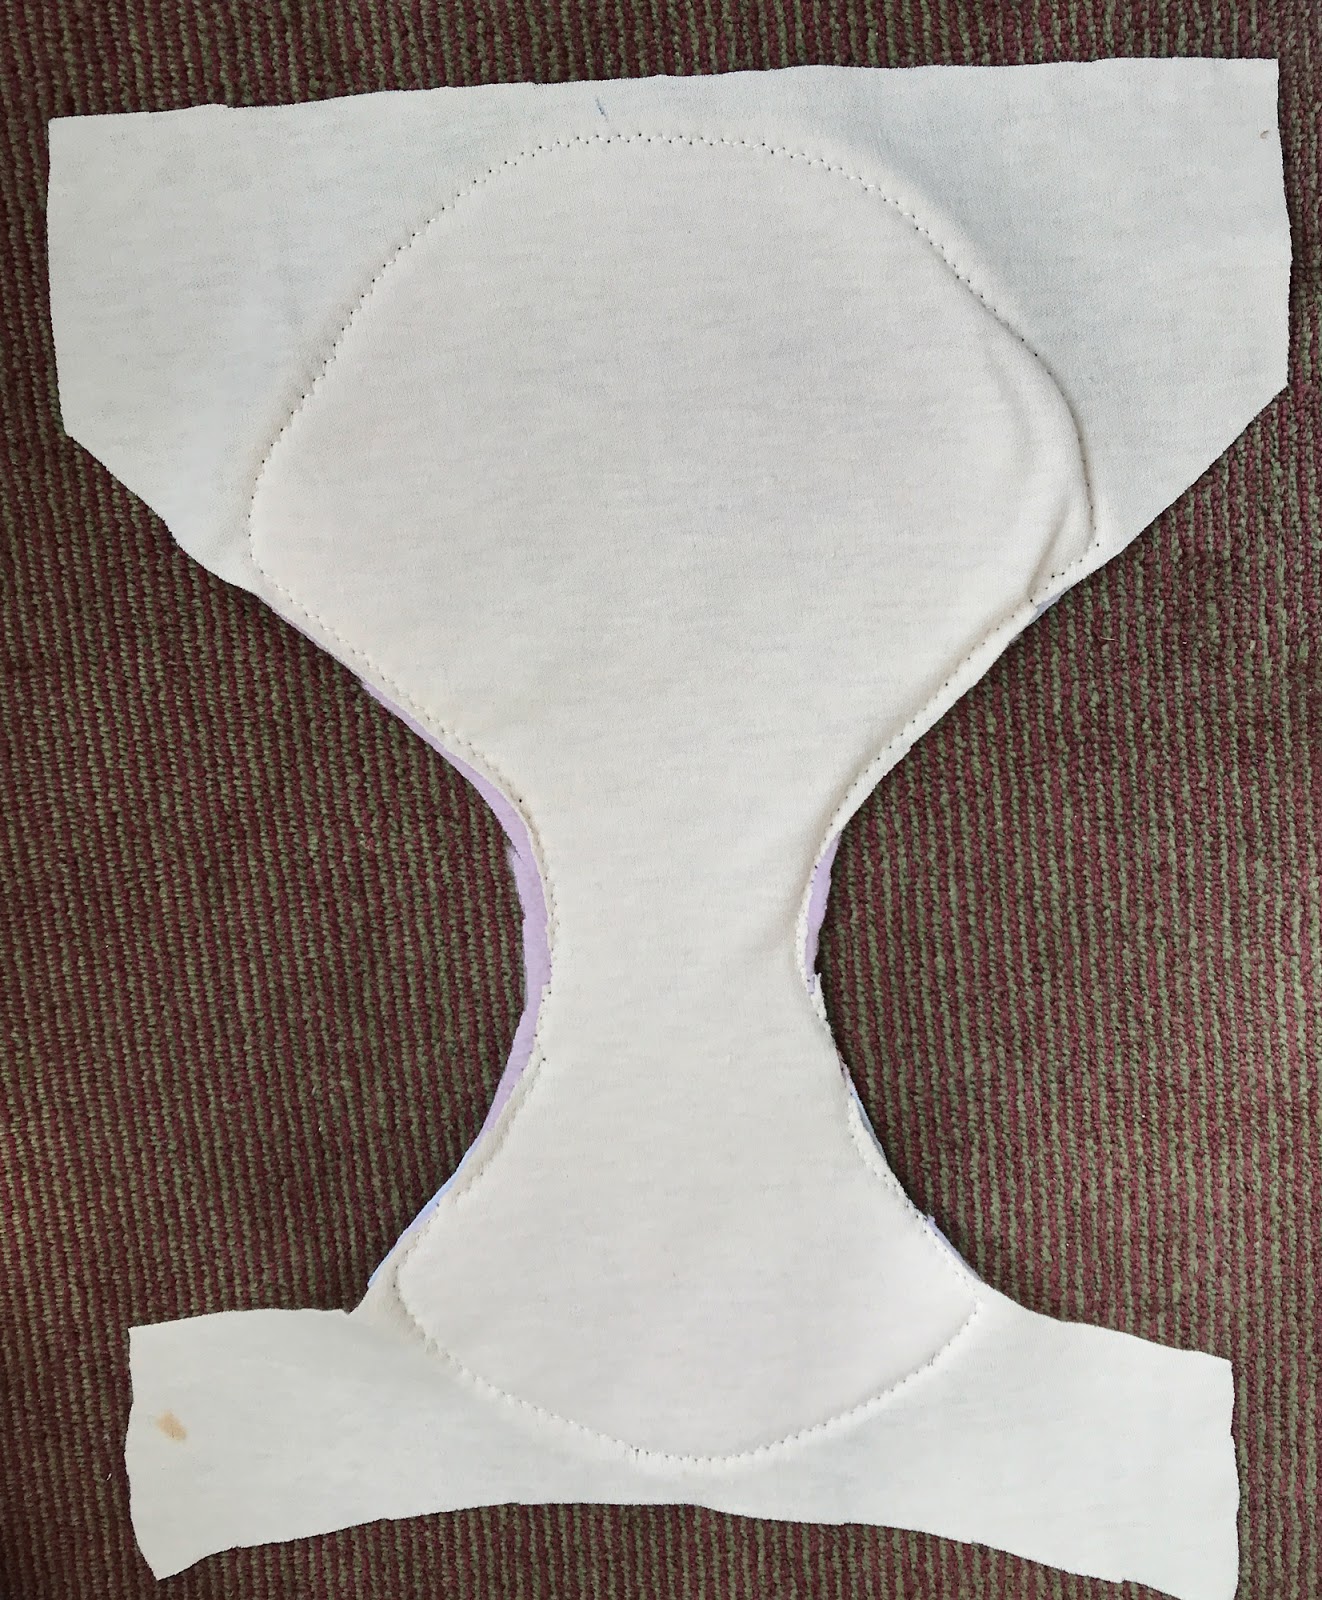
Steph made herself a template for these two inner layers, but helpfully showed a picture of what it was like.
From Steph Sanna's post on MBJM Facebook page, 28/02/20

So I drew a similar shape for mine, which you'll see in some of the pictures below..
After making the first pair, these 'pony pants', I decided to batch produce the next three. So I cut out all the pieces. (You'll see this time I joined the pattern pieces by overlapping them, as Steph does, to make one single piece.) Here are three outers:

And here are all the four layers for one pair. From top to bottom: the inner lining, the fleece padding, the PUL layer, and the outer layer of the pants. The inner linings were bits of offcuts of T shirt material, so a very lightweight knit, and the outer fabrics were just scraps of knit fabric left over from various projects.

I built up the layers as Steph showed in her picture tutorial. First, the layer of fleece is laid on top of the lining material.

Next, the PUL layer with the waterproof side to the fleece. Fleece creeps, so I used clips and some pins to hold this all together before sewing it.


I zigzagged all the way round. (I don't possess a serger / overlocker, but the zigzag worked just fine.)

And here's the inner side, the side that is going to be against the baby's bottom - lining, followed by fleece, followed by the PUL.

And now we switch back to the pony pants for the next photo! The complete lining goes inside the outer, wrong sides together. Here you can see I've pinned the two together round the legs and the waistband. Look at that beautifully placed pony!

On the first pair, I was sufficiently worried about it all slipping, that I hand-basted the layers together. You can do this if you have slippery or creeping fabrics.

The sizes for the leg and waistbands are given in the original MBJM pattern. Because they are stretchy, they are slightly shorter than the leg hole / waist. First they are sewn in a circle, then stretching slightly to fit, attached to the respective seams - leg or waist. The normal method of attaching bands to legs and waistbands is to fold them in half wrong sides together, then pin them to the right side of the seam, and use an overlock stitch to attach them. I have something that looks a bit like an overlock stitch on my sewing machine, thus. And so attached the first leg band like this.

However, I didn't like this very much, I thought she would find this type of seam itchy. It always looks unfinished somehow to me, even when I see it on ready to wear garments. So I attached the next leg band (and all subsequent bands) in the way you would attach bias binding - by opening out the binding and attahcing one side to the outside of the garment first, then folding over and sewing the other side so as to encase the seam. Here's the outside being attached, with a light zigzag stitch to retain some stretch.

And you can see the finished leg bands and a waistband below, which I think look neater than the overlocked version.


Here are the second lot of three pants completed. I'm afraid by this time I wasn't worrying too much about the pattern being the right or wrong way up. So as cut them as just one piece, the icecreams and sandcastles are upside down on the front of the yellow pair. The two year old hasn't noticed! She's looking downwards on the front. So they look alright to her.

I never managed to get a proper 'completed' photo of the first 'pony pants'. I took them for a try on, to get a view as to which leg band attachment method to use (having used a different method on each leg). But they were delightledy requisitioned for immediate use. And even the in-wear photos aren't much good, as she spent the whole time running from room to room in her pants, so these pictures are taken from video.

At least you can see the ponies are all the right way up, back and front. But I never did get a chance to change the leg bands to match erach other.
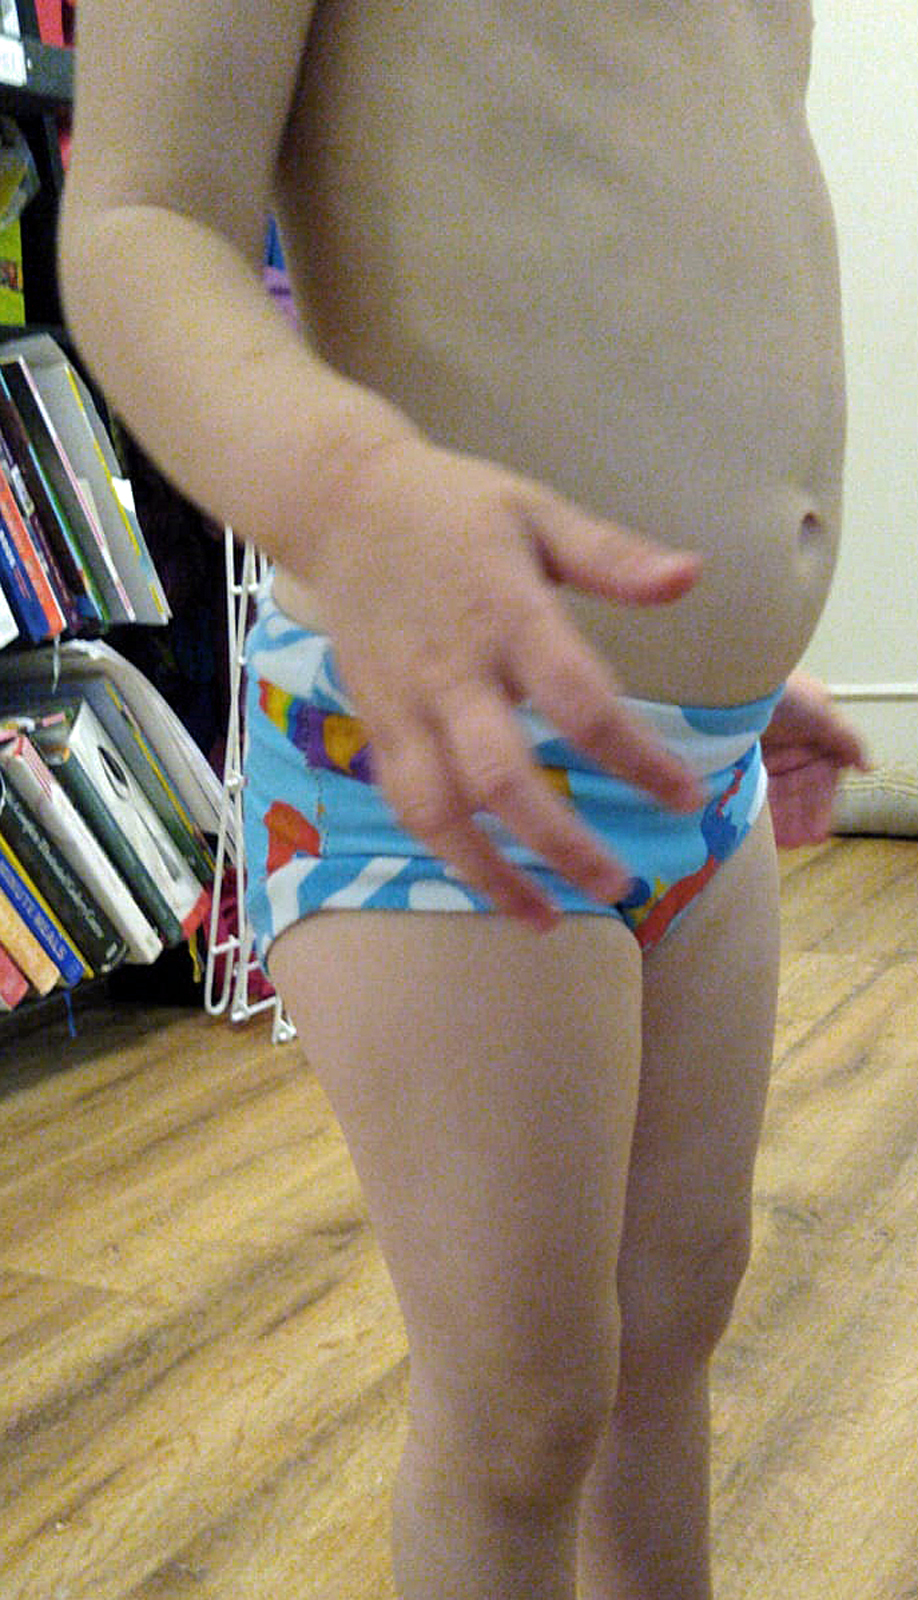
And maybe you can see how much she loves them - which is why I had to make more!

Thanks for this, such a clear tutorial. I wonder if this will work for wonder undies as well to make period pants! I am off to play 😊 Rachel
ReplyDeleteI don't see why it wouldn't work for wonder undies!
DeleteThese are just what I've been looking for. Thank you
ReplyDeleteThank you for a brilliant tutorial. I will be making training pants for my two granddaughters.
ReplyDelete