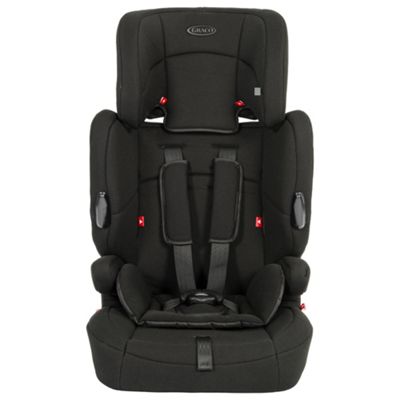
It wasn't actually this model car seat, but you can see the padded covers for the straps clearly on this picture as they should be. Two of them.
So the next sewing request was for a new set of strap covers. (A set, because, of course, you want them to match.) To find out how I made these (easy as pie), read on.
What do you need to make these?
- a template - see below
- some small pieces of double sided ready quilted fabric, or other thick padded fabric, which will also be soft to baby's skin - you could easily get these out of something the size of a fat quarter, or even just some small 6" squares.
- 4 snap fasteners
- double fold bias binding tape, preferably the stretchy type
- Sewing thread
- A basic sewing machine
First, I made a template. I just drew round the original strap cover that was left. Further down this page, you can see my finished strap cover compared with the original. But if you don't have an orirignal, or just want a new set of strap covers for any straps, here is my template.

To get enough thickness, I used two layers of double sided ready quilted fabric. Oh, I'm such a fan of this stuff, and it seems to be harder and harder to get. The first one, which would be inside, you can see clearly below. The second one, which I also used for a sunglasses case, was denim on one side and bright blue on the other.
To make the cutting out easier, I attached the template with Sellotape rather than pins, which would make it all bend up with such thick fabric.You can see the Sellotape above ready to be stuck on the second fabric.
I cut two of each, cutting the outer layer a little wider than the inner layer. Why? Because if you fold thick materials one inside the other, the inside layer is going to poke out a bit in the direction of the open edge. Ever tried folding towels or duvets? You can see the outer layer wasn't a huge lot wider, just a bit - I gauged it by folding the two layers.

The first thing I then did was attach snaps. It's much easier to attach them just to the inner layer. However, you need to make sure that they are not too close to the edge, or it will be very difficult to attach bias binding around the edge. If you are going to use half inch double fold bias, for example, you need the snaps to be slightly more than half an inch in from the edges.

Next, I sewed the two layers together for about an inch and a half (c 4 cm) in the middle of the fold, to keep them together when folded. You can maybe just about see this in this photo of the finished cover.

The next task was to attach double-fold bias binding all the way around the edge to hold the edges together. I used a stretchy bias binding, but if you're prepared to fiddle with it a bit you might be able to use non-stretchy. I always apply bias binding by attaching to one side, easing round any corners, and then fold it back over and stitch the other side 'in the ditch'. Here, I've part sewed the first of those seams, pulling the two layers together from the centre seam I just made.

I overlapped the ends of the binding 'raw' because that stretchy type of tape doesn't fray. And here is the finished cover. (I made two, of course).


Here is one of the new ones compared with the original on which I modelled it

I'm sure you can guess what happened as soon as I'd finished the new set of straps? Yes, you are absolutely right - the 'lost' old one turned up! However, the old ones came into another use. The new moses basket, a sort of plastic-y rubber-y material, was easy to carry without the baby in, but had hand-cutting-into properties once the baby was in it. So the old straps proved very useful to pad the handles of this, too!

No comments:
Post a Comment