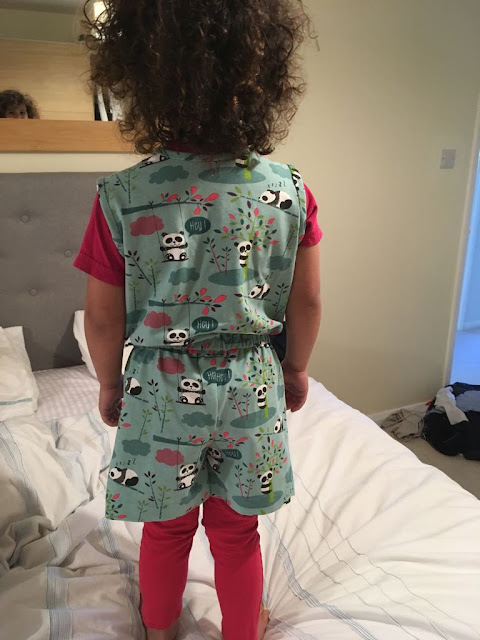
I wanted to correct some minor problems with the first one, and in the end, the laying out of patterns and rethinking the shaping took a great deal more time than the making up! You can read about some of the trials and tribulations below. Eventually, I'll hopefully have made a proper, repeatable pattern!
1) This one was made of a knit fabric so had more give in it
2) I decided to open it even further to facilitate getting on and off, and put in a zip. So it opened to below the waist. A bit fiddly.
For the shorts part, I used the pattern from the Purl Soho summer romper. I joined the front and back pieces together (overlapping them) to cut out just two legs instead of 4 pieces. As it happens, I don't think this was such a good idea for this project, because I wanted to sew up all of the front and install the zip, before attaching the front to the back. But I managed, by not sewing up the back seam of the shorts part till after I'd done the zip. Messy.
I used an adapted version of the Cottage Mama party dress bodice pattern as basis (in age 4 this time). I'd had to extend it downwards, because the summer romper is a dropped waist style, and the party dress fits on the waist, or even slightly above. I also had to add extra width to the front fold line, because, in having an opening, I needed some seam allowance for the zip. Finally, I scooped the front neck a bit more, because the last one was not scooped enough in my view.
However, then I realised I'd need to make the bodice approximately the same width as the bottom part of the romper, so I had to fold the side seam of the bodice pattern in order to widen it at the bottom but not at the armholes.
I also had to add a bit to the front waist seam of the bottom, to allow for the zip continuing below the waist.
So, lots of fiddling around with patterns before I could even cut this out!
Finally, it was all cut out and I could get on with sewing.
I sewed the front pieces together and sewed the zip in before joining the front to the back.
I considered all the various binding I had to make a contrasting / toning binding round the back. (I planned to use self-fabric bias binding round the armholes.
In the end didn't use any of these, I managed to make enough of the self-fabric binding to use round the neck as well, and I preferred it.
I make my self fabric bias binding by cutting and joining bias strips. I find the easiest way to make the strips even in width is to press creases using a steel ruler to measure. I had to join quite a few strips. You can find out how to make your own bias binding tape in this post.
I also used some of the bias strip to make a casing inside for the waist elastic.
And I added an elastic loop and button to the top of the front neck above the zip.
She seems happy with it.
However, a lot of trial and a bit of error. It's still going to take another go, I think, before I'll have a repeatable pattern. When I do, I'll do a fuller tutorial.


No comments:
Post a Comment