
They were so easy to make, that I finished all four in under two days. That included all the cutting out - and rushing to the shop for more fleece. They are actually a reversible style, but I don't think anyone wouldf be wearing them with the fleece side outside.
To find out how to make lovely cosy trousers for winter, read on.
I made these all exactly the same way, and, indeed, I used pretty much the same free PDF pattern - the Jereli pants pattern, my favourite go-to pattern for trousers. I used it wholly for the three smaller one, and modified it a bit for the largest (which is larger than the largest Jereli size). The sizes were:- Red tartan - age 7-8
- Jungle print - age 6+
- Butterflies - age 4-5
- Pink mermaids - age 18 -24 months.

First, the fabrics. I'm a big fan of ready-quilted fabric (especially double-sided, which seems harder and harder to get). I had had the red tartan (double-sided with plain red) for a while, The jungle print was an internet find - it has plain black on the other side. The butterflies print, also bought on-line, is very pretty, but is thinner than the others, as it is not double sided, and just has a thin layer of batting. The pink one was from my favourite local fabric shop, Fabricland, at which I've bought many of these ready-quilted fabrics before, but sadly there seem to be fewer each time I go.


All of the trousers needed about a metre of each fabric, except the pink ones, where I was able to get away with 70cms.

The pattern I based all of these on (except possibly the largest pair) is the Jereli free PDF pattern. It's actually called a pyjama trouser pattern, but, using thick materials for warmth, I wasn't after finding a narrow-legged design. I've used the pattern many times before, in different sizes.
The largest pair, I made in size 7-8. Although Fleur is only just 5, she's always been tall for her age, and she's grown out of 6-7s now. The Jereli pattern only goes up to age 5. But I figured she's not any wider than a 5 year-old, so I just needed to make sure they would be long enough. I had another pattern (a commercial Simplicity pattern, number 1334) from which I joined the front and back leg pieces along the outside leg seam to get an approximate length, and pinned it to the Jereli pattern at crutch level. The size 5 Jereli pattern was actually slightly wider than the size 7/8 Simplicity pattern, so I cut round the Jereli pattern mainly, but followed upwards and downwards to get the size 8 length. So you could say I used a combination of the two.

If you didn't have a suitable pattern for this age group, I think you could get away with using the Jereli pattern, extending about 1" or 2.5cm upwards at the waist, and adding a few inches to the bottom. That's all I did for the size 6. For the 4-5 size, I used the Jereli size 4, slightly longer, and for the 18-24 months size, I used the Jereli 18 month for the width, but the age 2 length.
I pretty much cut out all four pairs before I started sewing. I kept them pinned together so I wouldn't forget which leg was which (as each is a mirror image of the other leg). Note that I pressed all seams as I went along, but I'll say more about that later so as not to disrupt the flow!
I used the trick I learned from Shwin and Shwin to make (effectively) reversible trousers, as I have done many times previously. Actually they have a free pdf pattern for making reversible trousers, but it's for knits, and only for a baby 3-6 months. So I've never used their pattern, but many times, the method.
First, you join the lining to the outer at the bottom of each leg, right sides together. (Shown on the red pair.)

The next step is to fold each leg right sides together, and sew the whole inside leg seam from top to bottom, i.e., from the top of the lining right along to the top of the outer. (Shown on the butterfly pair.)

Then, turning one leg the right way out, you put that leg inside the other one (which is still inside out). So they are now right sides together. (Actually, with this red pair that I made first, I turned the whole of each leg, lining and all. Afterwards I decided it was easier not to do that, but to put the full length of one inside the full length of the other, so you are effectively sewing up a very long legged pair of trousers. You do need to keep the lining out of the way in the next step......

...which was, to pin and sew the crutch seam of the outers together from back waist to front waist (or vice versa, it doesn't matter). Keep the lining pieces out of the way. (Pinning shown here on the jungle print pair.)

What I did next was turn both outers the right way out, and pull through the linings. I pinned these roughly in place inside the outer so I could check the fit. (This is not a necessary part, and you'll have to unpin it again to get any further, but I like to see I have got the linings in the right place and not all twisted.)

Then, you pin the lining pieces together right sides together. This has to be done in two halves. Make sure your seam is facing the seam of the outer fabric.

When it comes to sewing this crutch seam in the lining, I like to pull it up a bit so that I can sew from the waist to just past the inside leg seam. (You won't be able to get much further.)

Then, you go in through the other side and sew to just past where you stopped before. This means the whole seam is sewn.
Perhaps now is a good time to talk about pressing seams, and reducing bulk, as this will be the last time you can do that. (In fact, you are already a bit late for the bottoms of the legs.) It's always important to press seams as you go, when you are sewing, but using these kinds of fabrics with quite a lot of bulk presents its own challenges.
First, let's look at reducing bulk. I improved on the way I did this as I went through the pairs, so you'll find I was playing catch-up in some of the early photos. There are two main things you can do. One is to clip corners where you can. For example:

And the other is to take out some of the quilt fabric batting on the seam allowances. To start with, I did this after I'd done most of the sewing up. To remove it, you first have to separate the layers. pulling them gently apart. This will probably mean unpicking a bit of the quilt stitching. Do this very carefully though. I did actually clip the fabric on one of the pairs and had to do a bit of repair work. In this picture, the black fabric at the back of the quilting has been pulled down.

Then, you take out as much of the batting as you safely can. Again, be VERY careful with this, not to cut the outer fabric. (The inner doesn't matter so much as it will be inside.)

This will then give you a much thinner seam allowance.
Later, I realised it is much easier and safer to start thinning it out before you do much sewing up.
Reducing bulk in this way will make it easier for you to press seams - you want to get these as flat and neat as you can. However, here's the next bit of advice. Both types of material will melt very easily (to the point of being ruined) if you don't prepare. The first thing I do is to use an ironing sleeve board - it's ideal for putting into little trouser legs etc, and I use mine a lot for children's clothing.

Secondly, don't use a hot iron. I use mine on 'Synthetics'. But I also iron through a damp cloth. This photo is not as clear as I'd hoped it would be. The chequered material at the bottom is in fact a dampened tea towel, and it's laid across the opened out seam. Then I iron through it.

So, you've now got to the point that you have nicely pressed seams, and you've done everything on the trousers except the waistband. The next thnig I did on each pair was to make a little ribbon loop to attach close to the centre back (to the side of the seam). I first attached it upside down on the outer. It would eventually be trapped between the layers.


The purpose of this, of course, is to mark the back. Because these are properly shaped trousers, there is a difference between back and front. So the child knows which way they go!

Having attached the loop. I next mark the first line of stitching for the waistband. This is the lower line. I marked this 1 3/4" below the top. (I know the pins don't look very straight here. They were by the time I'd finished.) Then I sewed all the way round.

Next, I turned in my thinned down seam allowance on the outer fabric, about 1/2", and the same on the fleece lining - the seam allowances were turned in towards each other. I pinned them all the way round, apart from a 2" gap one side of the back seam. You can see how turning the seam alllowance down has had the effect of turning the litle loop the right way up. Then I sewed it up, apart from that gap.
I got so excited on all four pairs at this point that I was nearing the finishing line, that I failed to take any photos of the final steps. So I'm having to dig into the archives for 'here's one I made earlier' - or in fact, 2
First, here's another view of pinning the layers together, which may be clearer. This was on some genuinely reversible pyjamas, made of much thinner fabric. (Same Jereli pattern though.)

In the next picture, you can see the top line of stitching, and that I have threaded 3/4" elastic through via the gap.
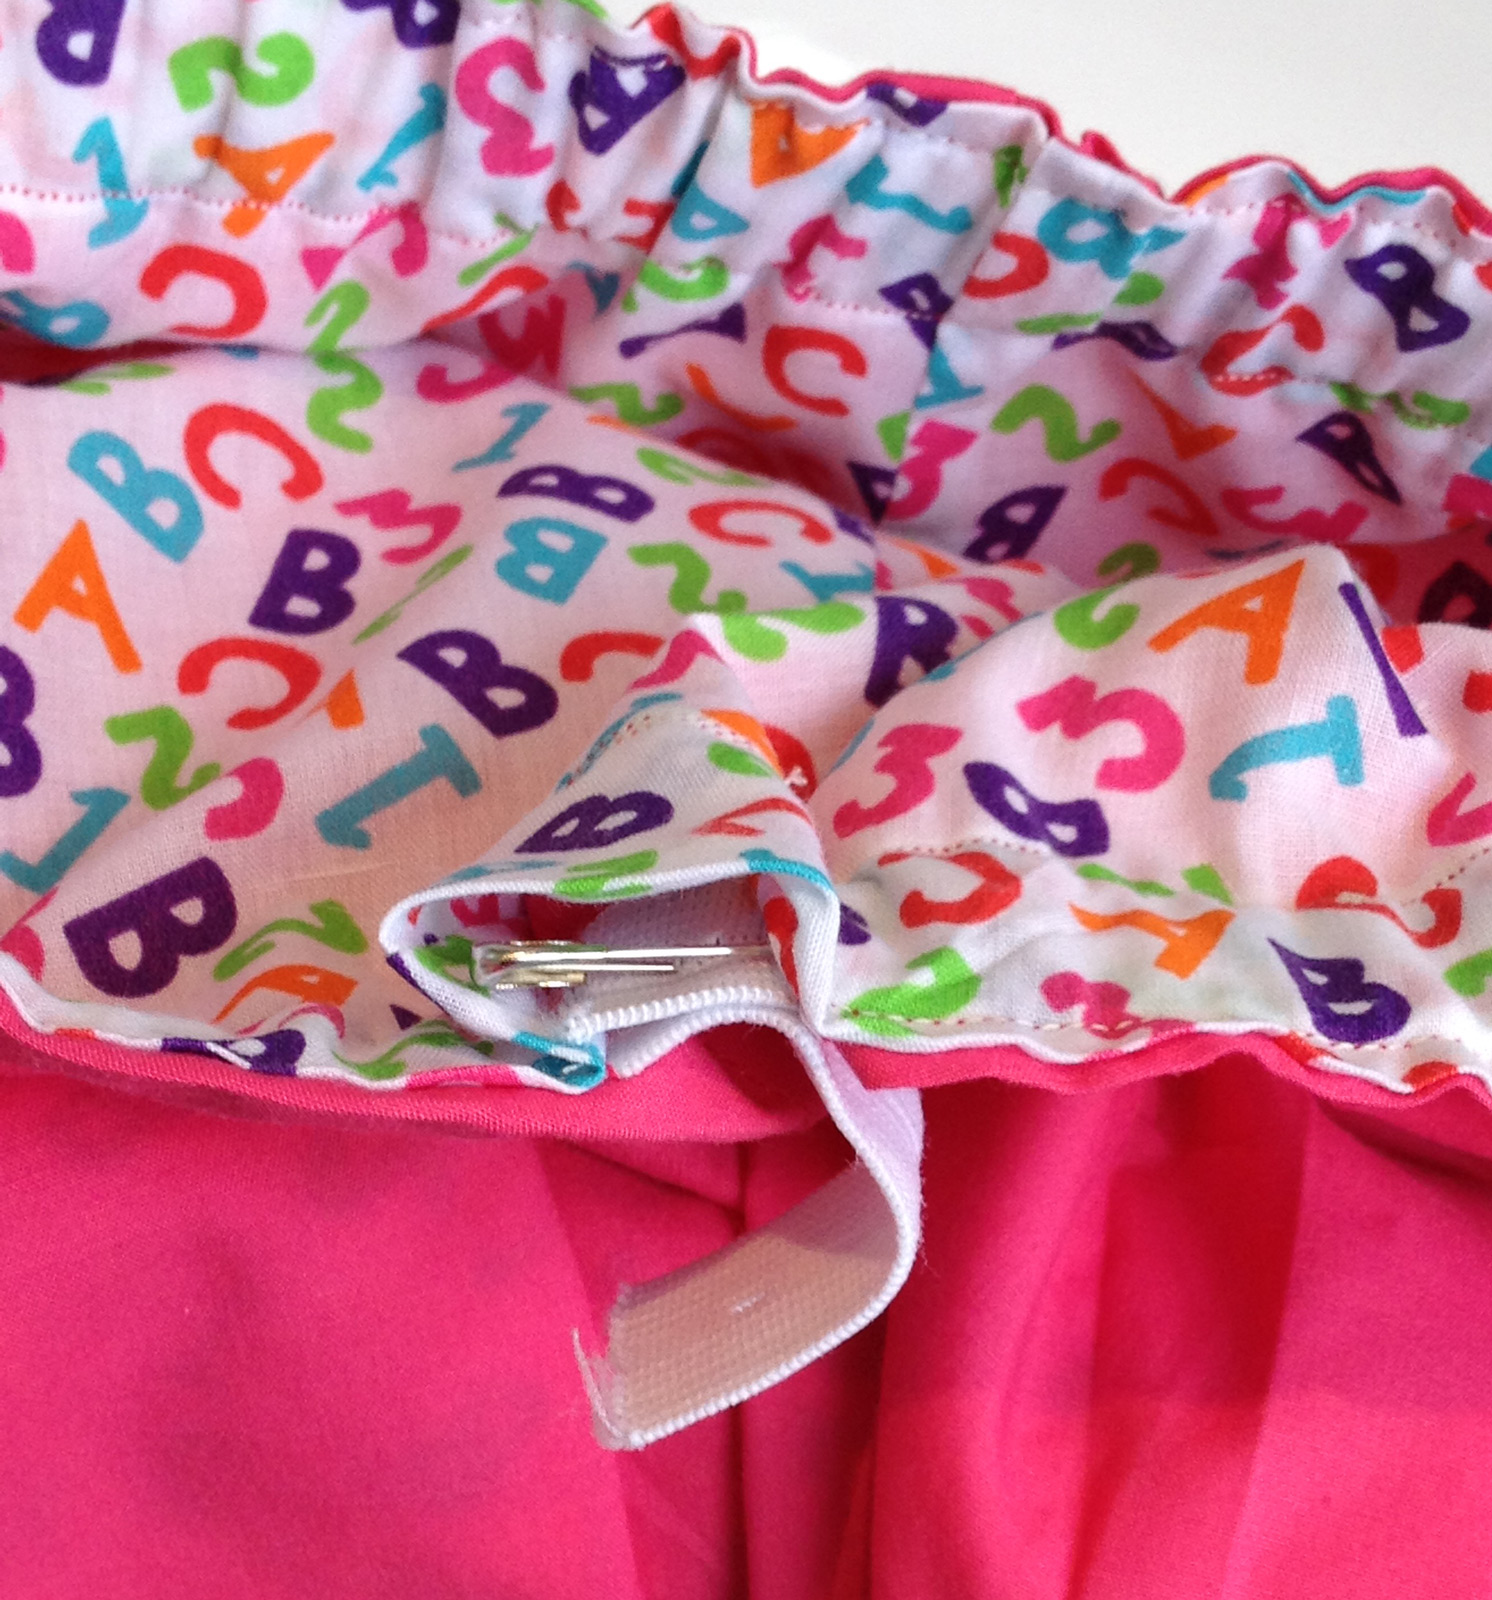
Of course, you do need to measure the waist for the child, and I would generally cut the elastic slightly shorter than the waist measurement, and overlap 1". I measured these children, and promptly lost the bit of paper, so I was guessing a bit. So I didn't cut the elastic too much shorter than my vaguely remembered waist measurements, but I overlapped by 2". That way, some margin for error, and easily rectified if I'd remembered wrong. Anyway, what I used was a 22" piece of elastic for the largest size, 21 1/2" for the second size down, 20 1/2" for the next size down, and 19" for the smallest.
And four pairs of trousers ready for the winter chill. We're celebrating Christmas early this year, on 8th December, so they'll have them to unwrap for 'Christmas Day'.


So we'll hope to keep them warm and cosy this winter!
No comments:
Post a Comment