This is yet another variation on the basic A-line dress - the most versatile dress style there is, in my humble opinion! This one has a bodice yoke, and a deep frill. You could do more layers, or course.

Here's how to make something like this delightful little rabbit dress.
This is a special case of my 'colour blocking' approach to A-line dresses. The general idea of these is that you split the pattern but add on seam allowance to either side of the split. For this dress, I wanted an empire line length bodice (i.e. a bit above the waist), so I split my size 4 pattern straight across at right angles to the centre front fold (and the centre back seam) about 2" below the armscye. (Actually, as you can see, I didn't actually split the pattern, I folded it back.) Then I added 3/8" for the seam allowance.

For a colour-blocked dress like this one, I could just have added a 3/8" seam allowance to top of the remaining A-line pattern. For this pretty cotton rabbit dress, I wanted something a bit fuller, and so I used a simple rectangle for the next layer of the skirt. (This was, from memory, about 1.25 times the circumference of the bottom edge of the bodice. But you could make it 1.5 times.) And finally the bottom frill was about 1.5 times the circumference of the bottom edge of the first skirt layer. (If you want exact sizes, I'll have to go and retrieve the dress from its owner! I knew what the total length of the dress needed to be, measuring from the nape of her neck to the back of her knee. So I just worked out how much fabric I had and worked accordingly. I'm pretty sure the frill was about half the length of the first skirt layer.)

I cut two layers for the bodice (of the same fabric), so I would have an outer and a lining. I planned to have the dress open at the back down to the level of the yoke. Here are the bodice and the lining pinned on the shoulders ready to sew.

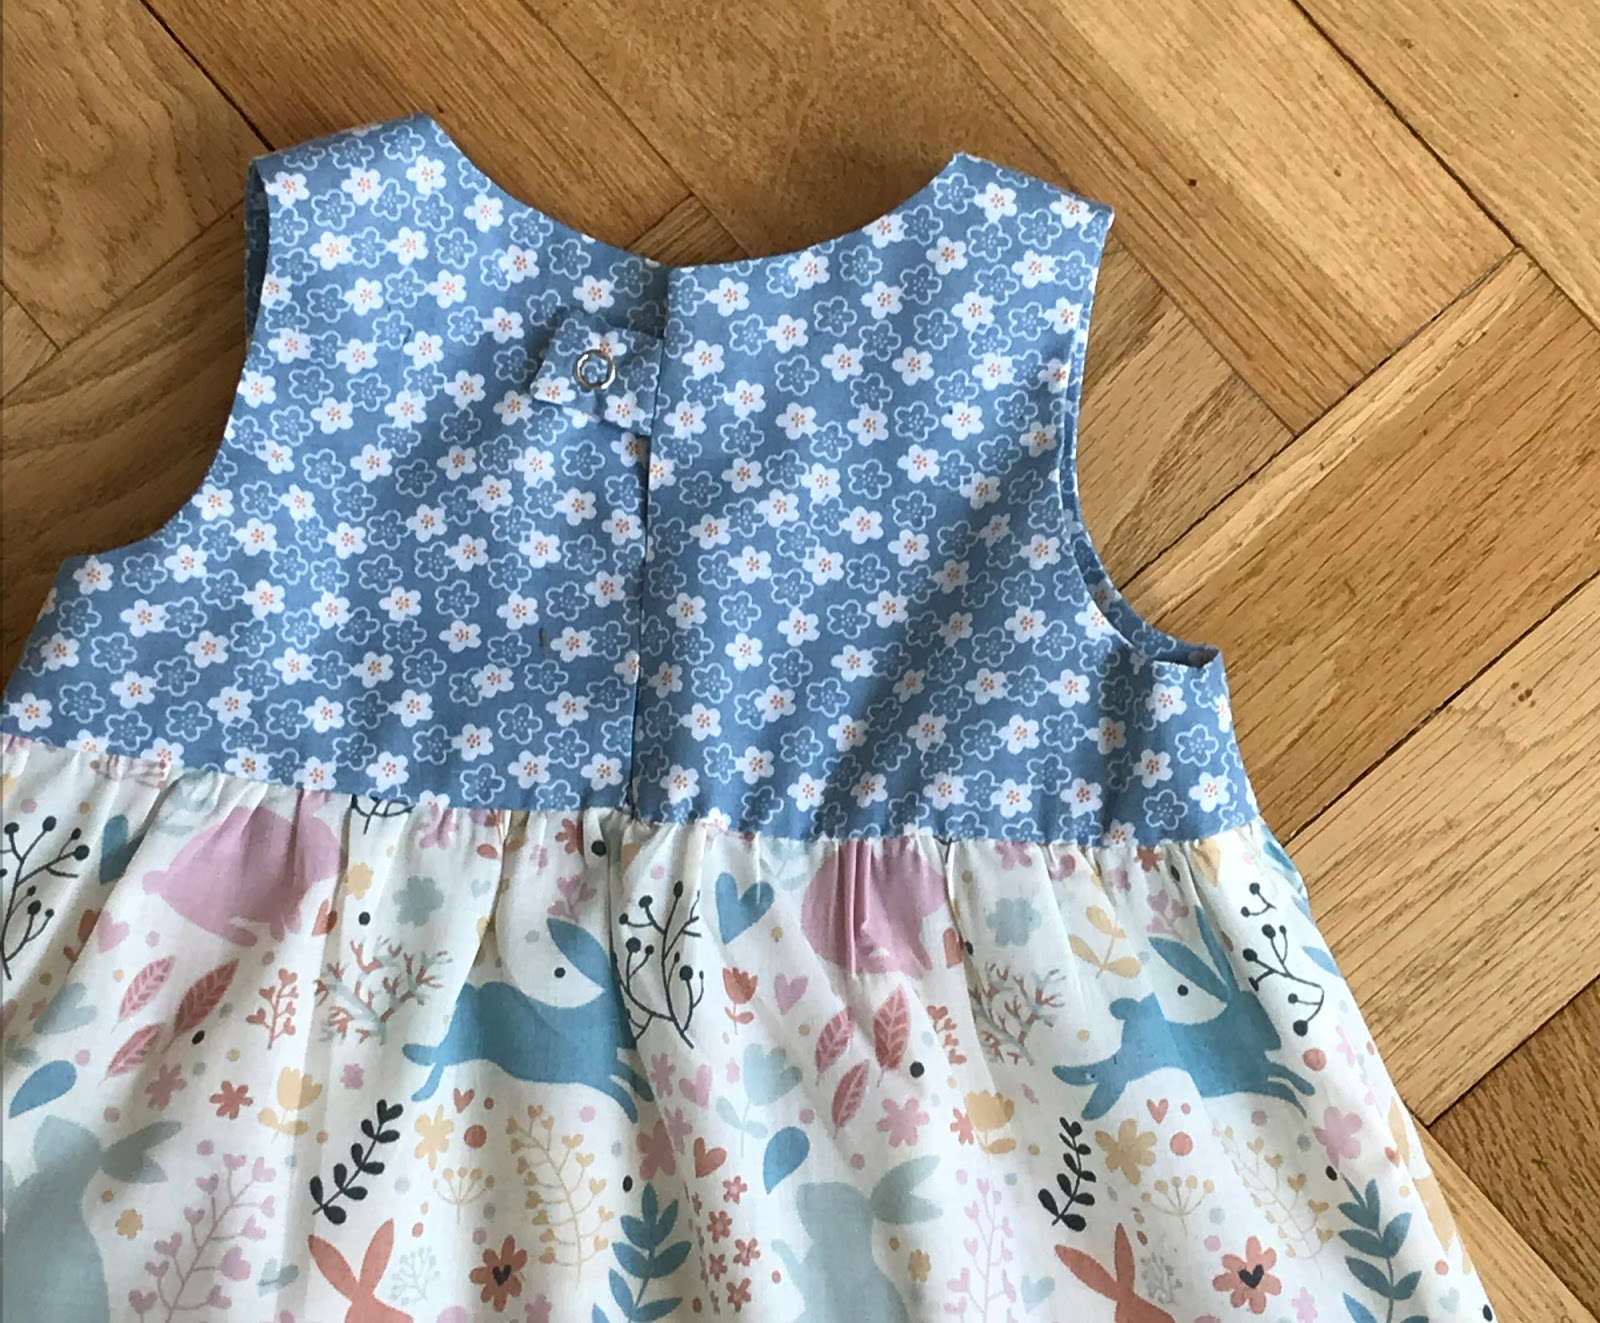
I then stitched the bodice and lining together around the armholes and neckline right sides together (but NOT the side seams). I included a little tab for a snap fastener closure. There a lot more details about how to do this in this post. You can also find alternative methods of closing a back neckline here.

Next I trimmed and notched the curves before turning the bodice right side out through one shoulder, and sewed the side seams of the lining and bodice, matching the armscye seams.
You could just gather it and attach it to both layers of the bodice, and serge or zigzag over the seam. I prefer to encase the skirt in the bodice so there are no itchy raw edges at chest height. So I sewed it first to the bodice outer, and then pressed up the seam allowance of the lining and stitched that to the inside. Sometimes I do this step by hand, especially with small sizes, but sometime I over-sew it by machine. I think this was machine sewn.
And once you've attached the skirt - that's it!
Note that in these pictures of the finished dress, Rose is wearing it over a pink T shirt. The sleeves are not part of the dress! But she's in the locker room, and I think she just pulled it on over her gym clothes.

No comments:
Post a Comment