/*CUSTOM CONTACT FORM BY ICANBUILDABLOG.COM */ .contact-form-widget { margin-left:auto; margin-right:auto; width: 600px; max-width: 100%; padding: 0px; color: #000; } .fm_name, .fm_email { float:left; padding:5px; width:48% } .fm_message { padding:5px; } .contact-form-name, .contact-form-email { width: 100%; max-width: 100%; margin-bottom: 10px; height:40px; padding:10px; font-size:16px; } .contact-form-email-message { width:100%; max-width: 100%; height:100px; margin-bottom:10px; padding:10px; font-size:16px; } .contact-form-button-submit { border-color: #C1C1C1; background: #E3E3E3; color: #585858; width: 20%; max-width: 20%; margin-bottom: 10px; height:30px; font-size:16px; } .contact-form-button-submit:hover{ background: #ffffff; color: #000000; border: 1px solid #FAFAFA; }

Welcome to my Blog

I am a grandmother to 4 little girls. I blog about the things I make for them, review patterns, provide tutorials on how I've dealt with techniques or problems, which I hope may help others, and give links to the (mostly) free patterns I use. Every so often, I do a 'Best of..' post listing the best free patterns I've found under specific headings - babies, girls, boys etc. Enjoy the Blog!

Monday, 31 December 2018

Premature Baby Patterns - Page 3 - Ready for more clothes?

This is the third of my pages suggesting free patterns for premature babies.  All babies are different, and my splitting up of the 'stages' is somewhat arbitrary. I've just done it in order not to have one great long post with lots of ifs and buts. I'm assuming you have arrived here either from my Introduction Page 1, or Page 2, dressing a very premature baby. This post is mainly for babies who have reached 1.5 - 2.5 kg, (about 3lbs  - 5lbs) or 32-36 weeks' gestation. Or perhaps the baby was not quite so early, but was small at birth, or had a few problems resulting in a stay in the NICU.

If the baby is still in an incubator, with several tubes and wires, you may be better starting with Page 2, or even my Introduction Page 1, since these babies may not be ready for much clothing. But eventually, some of the tubes and wires will go, and the baby will be stronger, and it is so encouraging to the parents to finally see their little one in some clothing of their own. This little kimono garment is covered in Page 2, as it may be suitable for very premature babies, but it also works very well as the baby grows, so I'll cover it here as well.


In this post, I'll give you links to some further free PDF patterns and tutorials for clothing that may be suitable for a baby that is still very small, and may still not be ready to go home. 

I'll also cover some of the most important principles, so that you can decide on suitability, if you find other patterns, or even ready-to-wear clothing that is supposed to be for premature babies, but may just be small.

All clothing for premature babies should be made of very soft cotton, preferably flannel, and capable of being washed at 60 degrees centigrade. At this stage, you still want clothing that doesn't need to be wrangled over the baby's head, or their arms and legs squeezed to try and stuff them through tight sleeves or legs. And it may have to go over some tubes or wires. Ideally, the garment can be laid flat on the cot or in the incubator, the baby placed on top, and the garment wrapped around, as with the kimono above.

So for ideas for this stage in a premature baby's life, read on.

Sunday, 30 December 2018

Premature Baby Patterns Page 4. Nearly ready for home?

This is the fourth and last of my pages suggesting free patterns for premature babies.  All babies are different, and my splitting up of the 'stages' is somewhat arbitrary. I've just done it in order not to have one great long post with lots of ifs and buts. If you have a baby which still weighs less than 5 lbs or 2.5 kgs, OR is in an incubator with a number of interventions in the form of wires and tubes, OR which has been recently born at 35 weeks gestation or less, you may be better starting with one of the other pages, and returning here afterwards.

However on this page, we talk about babies either born at 36 weeks or so, who will perhaps not stay long in hospital, or who, having had a period of  more intensive care, are now more or less tube and wire free; maybe he or she weighs 5 lbs (c. 2.5 kgs) or more, perhaps he or she is almost ready to go home? Or perhaps the baby was not premature at all, but is just a small baby? The newborn clothes in the shops may still be a bit big. What kind of clothes can you make for this stage? This is what this page covers.

Touching Little Lives Preemie Sleeper

I will still urge you not to make too many clothes in these tiny sizes. The baby will grow so fast, they'll be out of them in 2-4 weeks, and allowing for washing in between, they may not get many wears out of them. Almost better to try some of the newborn size patterns, and roll up the sleeves for a couple of weeks!


In this page, I'll suggest some free PDF patterns that may work, which come in this size. 

Thursday, 29 November 2018

Winter dresses for little girls

This year, I've made Christmas dresses for all the girls. The last ones I made for the three oldest, were in 2015. 


I haven't done this now for three years, as the oldest subsequently refused  flatly to wear a dress of any kind. But it seems she's warming a bit to the idea, as long as it's not pink and frilly - perhaps it's because she's started school and all the girls wear the same uniform skirt. So she doesn't feel so bad about skirted garments. 

So here are the new ones (now there are four of them!)


You can find out more after the jump.

A new Tartan dress for Christmas.

My oldest grand-daughter, Fleur, 5, has for the last few years totally rejected dresses, even for church. She's been persuaded into a skirt on occasion, but by and large she's preferred dressing in trousers or shorts, no matter the occasion. So my wish to repeat what I did for Christmas three years ago, of making them ALL a new Christmas dress, has just gone by the board. 

But we can sense a small change in her attitude. She has to wear a skirt as part of her school uniform now, and all the girls in her class are in skirts, so there can be no argument. And she's now agreed she'd like a new dress, so long as it isn't frilly, or pink, or in any way princessy. (She caught sight of her youngest cousin's dress, see here, and said determinedly "I don't want THAT dress!" We pointed it it was far too small for her any way.)

So here's what I came up with for her. It's red, which she likes, and it's not frilly (has pleats rather than gathers), and it has nothing itchy inside. Yet it is quite stylish. Let's keep our fingers crossed she'll wear it now!


To find out how you could make something similar, read on.

Wednesday, 28 November 2018

Good Deeds dress with lined bodice and sleeves

The Good Deeds dress - my latest version


This is based on a great pattern that I have used before. It comes from Elysium

This probably doesn't look a lot like the original, but I wanted to develop it into something I could use as one of my Christmas dresses this year. I wanted sleeves, and I wanted the body lined, for warmth. However, that presented some challenges, and I wanted to write up exactly how I did it so that anyone else trying it in future will be a bit further up the learning curve that I was.

Note that a friend of the pattern author  has also written a tutorial on her own blog, Night Owl Menagerie, for a lined bodice version, (without sleeves) but in hers, she joins the skirt to both layers of the bodice (outer and lining) together, leaving an exposed seam. The skirt part is unlined. And I think she may join the side seams both layers together, exposing the side seeams. 

This IS a lot easier than my version, but for my grandchildren, who will quickly complain of itchy clothes, I wanted to ensure the seams were contained within the lining. (I also think it looks neater, especially if, like me, you don’t have a serger.) Here's the inside of my version.


As you can see, I've also added sleeves to mine. 

I've written up below what I did, but I've  will also later be writing a 'How To' for alternatives (for example, without sleeves, without a frill). But for a simpler version without sleeves, the Night Owl Menagerie tutorial may work for you.

Tuesday, 27 November 2018

An outfit for a baby boy

I wrote recently about the baby girls' clothes I made for one of the two twins, my husband's great niece and nephew. Having 4 grand-daughters, I always find it easier to decide on and make girls' clothes, but this time I've a boy to make for as well. Here's what I came up with.


An dinosaur envelope neck T shirt and shorts!


You'll find out how to make these below.

Monday, 26 November 2018

Ruffled sleeved dresses for winter

The first two Christmas dresses I made this year were to be a 'matching set' for sisters Jane and Ada. As you can see, there is a difference in size. Jane is pushing 5, Ada nearly 18 months old. This also necessitated slight style differences, too, partly because the free PDF patterns I had didn't cater for both sizes. I also made Ada's cuffs and frill much smaller, as she still spends a fair amount of time on the floor!


Although I used two different patterns, there were many similarities of method, and so my 'how to' description below covers both. 

Technique: Easy way to put in a zip - a little tutorial

I was taught this method for putting in a zip by my mother, who, for most of her sewing life used an old hand-cranked Singer. It perhaps doesn't look as professional as an invisible zip, but it's so easy a beginner can do it, given a zipper foot to your machine. I've been sewing for over 50 years but I still think of myself as a beginner! Note that it doesn't really work for a zip fly, which should be assymetrical.


To find out how to put in a zip the easy way, read on!

Sunday, 25 November 2018

Christmas trousers

In the past, I've made warm winter trousers for my grand-daughters, as the need arose. This year, I decided I'd make them all a pair. Jane's from last year probably still fit her, but it wouldn't be fair to give everyone new trousers except her, would it? Especially as she's the girl who doesn't much like to wear trousers unless they're a bit special. Here they are. 


They were so easy to make, that I finished all four in under two days. That included all the cutting out - and rushing to the shop for more fleece. They are actually a reversible style, but I don't think anyone wouldf be wearing them with the fleece side outside.

To find out how to make lovely cosy trousers for winter, read on.

Technique: making home made bias binding

Why would you want to make your own bias binding when you can buy it in the shops? Lots of reasons! For me, it's mostly wanting to have the same fabric for the trims as the main (or contrasting) fabric of whatever I am making. But there is also a limit to the colours and sizes and material available in the shops or on-line. (On-line purchasing brings its own special problems of colour matching and quality.) These are some of many that I've made to match (or contrast) with the main fabric in a garment.


But the idea of making bias binding yourself can perhaps appear daunting. That's why I have created this tutorial, with examples. I'll also tell you about my experiences and errors, so you can avoid the latter!

Sunday, 18 November 2018

Sewn toys and play things for babies and toddlers

Over the last few years, I've collected many ideas for toys you can sew for babies and toddlers, almost all are free. Many I have used! Now, I thought it was time I shared them on the blog. First, here are some links to other articles on the blog that have ideas and some 'How to's.

A Sounds bag, or Sensory bag - particularly useful for a child just learning to talk:


Ideas for a baby gym, including a crinkly snake:


Ideas for baby shower presents, including some toys and play things:


There are lots of other toy ideas and tutorials on my blog if you do a search. In particular, there are several articles on Quiet Books / Play Books, Dolls' Clothes, and Finger Puppets.

Below the jump, I will share links that I have found while doing my own research.
Note Craftsy / Bluprint links may now be defunct - I will try and find other links.

Monday, 5 November 2018

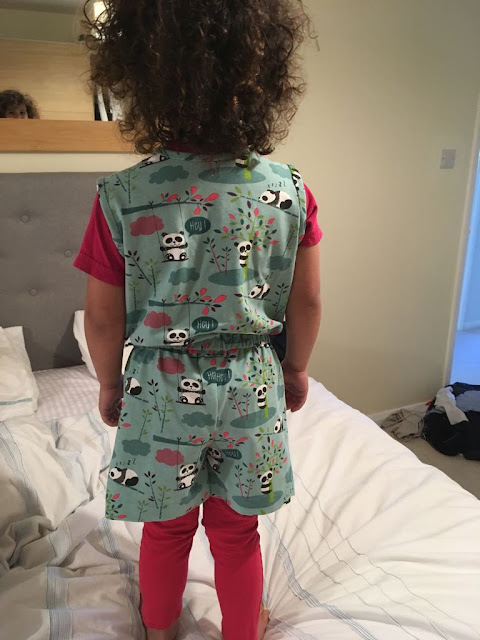
Another play-suit

A few weeks ago, I made a play-suit for my oldest grand-daughter, using fabric I had bought in Alaska. You can read about it here. Of course, as soon as it was delivered, younger sister wondered where her play-suit was, too. I had always intended to make one for her, but this sorted out for me what my next project needed to be!


I wanted to correct some minor problems with the first one, and in the end, the laying out of patterns and rethinking the shaping took a great deal more time than the making up! You can read about some of the trials and tribulations below. Eventually, I'll hopefully have made a proper, repeatable pattern!

Sunday, 28 October 2018

Baby girls' crossover jumper / apron

When Jane was a baby, I made her a reversible crossover apron (which can be worn as a dress, as in this picture). I used the free PDF pattern from Smashed Peas and Carrots. (More about this later.)


Here, she was just over 7 months old, but it fitted her for some time after that - till at least a year or 18 months.


The apron is still, in fact, going strong, 4 years on, and Jane's baby sister Ada is now using it mainly as a coverall bib. It still looks fine, but I thought I'd make Ada her own. And while I was at it, I would make I also made one for my husband's great niece for Christmas. We will be seeing his niece's baby twins then, his great-niece and great nephew, for the first time, thousands of miles away from their home and ours. They will be almost 9 months old, but, like one of my grandchildren, were 10 weeks premature, so a little smaller than the average 9 month old babies. An apron and matching frilly knickers (a nappy / diaper cover) for the little girl, and I've yet to decide what to make for her brother. But probably not frilly knickers. 

To see the latest versions of the apron, and how to adjust the pattern for a larger size,  read on.

Tuesday, 23 October 2018

Witch cape (and any costume cape)

Hallowe'en always seem to be the time for costumes. My daughter wanted a very quick witch costume for my grand-daughter. She had the hat, and a broomstick, so it was just a cloak.


This was one of the easiest things I ever made for my grand-daughter. It was made of a spare bit of black lining material. I used the same approach to cutting the cape part as for the Wonder Woman costume, i.e. a semi circle, with a small semi-circle cut out at the centre top for the neckline. The Wonder Woman costume post may give you more ideas.

I made a very simple hood, which was just a rectangle meauring roughly the same as the 'neckline' shown as x - x above. This was folded in half and stitched along the top seam into a pointed hood shape, then I got rid of the extreme point by just stitching across the point a couple of inches down. (You may be able to see the idea here.)

Then I attached the hood to the cape and finished all the edges, and added a couple of strings to where the hood joined the neckline at the front. 


The measurements were not very precise, and we never intended her to wear the hood 
(though she could have done) because she had a witchy hat.


And here's the finished cape being modelled by Leppie the leopard. This stuffed toy is almost the same size as a four-year-old child.


Monday, 22 October 2018

Layered skirt, rabbits and flowers

One of the grand-daughters wanted "a skirt with flowers", but agreed she liked this fabric with rabbits and flowers. (And so do I.)

I had originally intended to use the "This Mama Makes Stuff" design for her Twirly skirt pattern again. (Note that link may no longer work - try this one.) I had JUST enough fabric for this small size skirt (44" wide), as Rose is still only 3. Any longer and I would have needed a wider than normal fabric, or more joins. However, as soon as I started to look at the fabric I realised that the pattern was really strongly directional with rabbits and flowers. I thought it would look very odd with rabbits laying on their sides at the sides of the skirt. They really wanted to be upright. This changed my mind for me about how I would use the fabric. To find out how I made a skirt that still twirled, but had upright rabbits, read on!

Superheroes coin purse and pencil case

The most recent sewing request on behalf on the grandchildren was not for a new skirt, or trousers, but for a coin purse for school. Two of them have just started school this month, and one has to take a few coins in with her for lunch and the breakfast club. Her mother thought a little coin purse of her own would be useful. Maybe something with superheroes on? Especially girl superheroes? So I asked my other daughter - would the other school starter like a coin purse, too? No, she doesn't have to take any money - but perhaps a pencil case? And she is perhaps even keener than her cousin on superheroes, especially Spiderman, so no problem there in using the same fabric.

Here's the result:


You can find out more about how to make these simple zipper cases by reading on.

Matching baby pants from scraps

I recently made a crossover apron for my great niece (see this post). From the back, these aprons always look cute with a pairs of matching knickers underneath. (Though they work well with jumpers underneath, and tights or leggings, in colder weather.) I had a new (Spanish) pattern I wanted to try, a free PDF, so in this post I'll tell you how I got on. Here is the end result, together with the matching apron. I should add that I had only tiny amounts of the matching fabrics left, really just the leftovers, hence the title of this post!


Tuesday, 16 October 2018

Hats for babies and small people - free PDFs

There are several delightful patterns for children's and babies' hats, available as free PDFs on the internet. Usually these have full instructions. I must admit to my favourites, made over and over again because they work so well for my four grand-daughters. But in this post I will also try and provide links and reviews to many of those I've found which have promise. At the time of writing all of these are free. Some require you to register, but there is usually no charge for this.

The above two are from patterns I have made multiple times, especially the one on the right. But for my full review of free Hat PDFs for children and babies, read on!

Premature baby hat - free PDF

A small number of years ago, I was delighted to find a pattern for a premature baby knotted hat from Blesseddesigns.net, when we most needed it. 


Unfortunately the Blessed Designs web site for premature baby patterns no longer exists. I've tried to find it again for your benefit, to no avail. So in the end I created my own pattern for you. It is based on the Blesseddesigns idea, though, as I still have hard copy, so I owe them a debt, even though they no longer seem to exist! To find out more about my (free) pattern, and how to make up a premature baby hat, read on.

Thursday, 20 September 2018

Needle case project - ideal gift! A tutorial

A while ago, I wrote a post about how to make an easy sewing kit case. As I was writing it, I thought the needle case within it might merit a post, too, but it's taken me a while to get round to it.


Before you dismiss the offering below as like the work of a child - it is the work of a child, namely yours truly age 7 or 8. We were required at school to make these needle cases as a Christmas present for Mummy. That is one reason why this is such a nice project - even a child can do it, and it's a great idea for getting your kids sewing. As long as they can hold a needle without stabbing themselves - they can do it.


In this post, I'll tell you how to make a needle case like this, or, if you or your children don't like this little Dutch Doll design, I have several other suggestions for you.

Friday, 7 September 2018

Vietnamese style trousers - a tutorial

I'm breaking my rule here, that most of my posts are about clothes for my grand-children. These wraparound trousers can be used to make similar for a child, but as I originally wrote it up, the tutorial assumes these are being made for a woman. 


These are wonderfully cool, and very easy to make.  I bought two pairs in Vietnam, one black and one white, and was so impressed with the simple design that I plan to make more. It would also be very simple to scale this down for a child. You need no buttons, zips etc. If you are a confident / experienced dressmaker, the basic instructions will probably do, but for more precise details, read the longer version below.


Basic instructions (for confident / experienced dress maker)

These basic instructions will work for a small to medium size frame (UK sizes 10-12) of c. 152-165cm (5’0” – 5’5”) and may well work for someone a bit bigger. They are sold as ‘one size fits all’ in Indochina.  If you are a lot different from this, suggest you read the fuller instructions. And do so if these ‘ basic instructions’ are not clear enough. They are intended for someone who is prepared to do a bit of trial and error.

  • Cut two squares of material of about 1m x 1m (39” x 39”). A light cotton is fine.  I think the ones in Vietnam are just very simply cut from material of this width off the roll. Cut two long strings about 2 metres x 7cm (78” x 2¾“) for the narrow waistband and ties. If you have to have joins in the ties, suggest that rather than joining in the middle, you join a piece either end. You could use ribbon instead if preferred.
  • Fold the two squares in half. Measure down from the top and cut out a ‘J’ shape down each fold – for dimensions of this, see the more detailed instructions or just use trial and error. But start with smaller – you can always increase the amount you cut out but you can’t put it back! This ‘ J’ will form the crutch seam. Open the two pieces out again and lay on top of each other.  The ‘ J’ is now a ‘U’. Stitch the two pieces together around this ‘U’. Hem the side edges neatly. Press.
  • Now fold both halves back as you had them when you cut out the ‘J’.  You’ll have a baggy trouser shape open at the sides' like this sketch.

  • Make your strings inside out, sewing the ends, and the string parts, leaving open the middle part (waist band) that will attach to the top of the waist, and turn right side out. (Diagram 1 below not to scale – drawn so you can see the idea.)
  •  Attach your strings to the top of each half, front and back. Try them on as explained in the last section below, and decide where you want the lower hems, and turn up accordingly. Voila! The finished article.

Wednesday, 5 September 2018

Two children's garments out of a metre? (Part 3 and 4 - Flutter top and skirt)

In Alaska recently, I found two fabrics I loved. I could only bring back about a metre of each - probably a yard, as this was America - becauses I was flying home with limited luggage allowance. So I was determined to maximise what I could make, and went for two garments out of each fabric. That way, none of my grand-daughters could say I brought them nothing back from my holiday.

I wrote up the first two, from a fabric called Bear Mountain, a few days ago. If you 'd like to see those, too, they are here and here. Those were for the oldest and youngest grand-children. Now, here is the second fabric. 


This fabric is One of the Aunt Grace range, # 6257, by Judie Rothermel for Marcus fabrics, for which I bought 4 fat quarters. Unfortunately it's now out of print. Why do they always do this to me? I just find a lovely fabric I want to buy more of, when it's finished! I could list them - no, stop, it's painful!

Out of the second fabric, I would make two things for the middle two grand-daughters: a top for Rose, age 3, and a skirt for Jane, age 4. Each of these used two of the fat quarters, the skirt with a band of additional fabric.


To find out more, read on.

Monday, 3 September 2018

Two pieces of children's clothing from a metre of fabric? (Part 2 - Playsuit)

In my last post, I started telling you about the first piece of children's clothing I made from one of the fabrics I bought from  a lovely fabric shop called Quilted Raven, while travelling through Anchorage, Alaska. This fabric is called Bear Mountain.

The first, in my earlier post, was the toddler pants shown on the left, made for baby Ada.  In this post, I'll tell you about the playsuit for Ada's cousin Fleur. The challenge was to get them both out of this one piece, which was actually fractionally over a metre in length, as it was the bolt end.


Two pieces of children's clothing from a metre of fabric? (Part 1 - Toddler pantsts)

Travelling through Anchorage, Alaska, I found a lovely fabric shop called Quilted Raven. (Lucky folk in Anchorage! 7 fabric stores in town and two more up at Eagle River.) I picked up two pieces of fabric, one an offcut just over a metre long (by the standard 114cm wide - or 44-45 inches), and the other, I just bought a metre. (Come to think of it, as it was US, it was probably a yard they sold me.) I could have bought so many more pieces, I loved the fabrics, but I was limited as to the amount of extras I could bring home to the UK. Thank goodness I didn't have time to visit all the other shops, or I'd have been seriously overweight on my luggage!

Once home, I had to plan out what I could make for the girls. As I'd only managed to bring home two pieces of fabric, I had to get two garments out of each. Here are the first two, from fabric 1, called Bear Mountain.

Long pants for the toddler, Ada, and a playsuit for Fleur. To find out more, read on.

Wednesday, 22 August 2018

Free Boy Patterns (2) - Toddlers and up

A while back, I did a post about free patterns for boys - baby boys . There seem to be far more free patterns for girls on the internet, hence they are much easier to find. Although this mostly works for me - I have 4 grand-daughters - it seems unfair on those who want to sew for boys. Plus, one of my grand-daughters would much sooner wear trousers and shorts than a dress, especially a frilly dress. And my husband's niece had twins, a boy and a girl. So I started writing about patterns I had found that would work well for boys. Last time, I concentrated on babies up to about 12-15 months. Some of the patterns and pattern authors I recommended do have larger sizes too, so it's always worth checking them out.

Please recognise when I produce these reviews, it has taken a lot of research and late nights, so please don't just copy all of this onto your own web site without acknowledging the source. Thank you! 


This time around, I'll continue with my review of free patterns for older boys from toddler age onwards. With a big thank you to all the people who have so generously posted patterns and tutorials without charge. So read on!

Friday, 17 August 2018

How to adjust a trousers / pants / shorts pattern with the front and back identical

As most of my readers know, I mainly use (and review) free sewing patterns from the internet - that's what I do. Using patterns that have generously been posted for free does require an acceptance that they won't all be perfect, and you may sometimes have to fiddle about with them to make them work. (Not always, of course, there are many that are brilliant, and that I use again and again.) But how much worse to pay for a pattern and then find that one doesn't work either!

And my biggest bugbear by far, is the pants and shorts and trouser patterns which don't have a separate back and front shaping - or rather, the crutch seam is identical for the back seam and the front seam. It's really surprising how many people, even some who also sell their work, produce such patterns. It doesn't take a lot of thought to realise that human beings are not symmetrical when seen from the side! 

(I realise my drawing talents leave a lot to be desired - I should have taken lessons from Picasso. Hopefully you'll get the idea.)

So the patterns I recommend, like this one from Jereli for pyjama pants, result in pants that have a crutch seam higher in the back than the front, and (generally) have a longer curve on the back, so that the inside leg seam sits a little forward of the midpoint of the inside of the leg. If you look at purchased trousers, even jeans, you will see that shaping, to accommodate the wider part we all have at the rear! Even children and babies - especially babies, who spend a lot of time with their legs in the air - need space for bending at the hip. OK, you may just get away with this with knit fabric and a sloppy fit, but it ISN'T DIFFICULT to make a pattern correctly, and make the result more comfortable.


These above are from another pattern I recommend, from Suzi of Bay Patterns at Space. Note that the centre back is higher than the centre front. These were a really comfortable fit. The grandchildren wanted more of them!

However, you will find patterns which ignore this golden rule, so here's what you can do.
MORE BELOW

Thursday, 16 August 2018

A summer baby romper

After I had made beach ponchos and hooded towels for the girls this summer, I still had a nice piece of fabric left over. This was a soft stretch towelling.


I thought there would be just enough to make something for the baby, and I had in mind that it reminded me a bit of a little romper suit my daughter had when she was about 16 or 17 months old - though hers was cotton woven fabric - coincidentally it looks a similar colour / design in the photos!


To find out how I made a romper for my grand-daughter, read on.

Wednesday, 18 July 2018

Child mittens - review of free PDF pattern

Bringing my grand-daughter home from nursery one winter's day, I realised she had left her gloves at home. I thought I'd try and make her a quick spare pair, which could stay attached to her coat. That way, they'd stay with her!


I found this free pattern on the internet from Fleece Fun. It comes in 3 child sizes, as well as two women's and two men's sizes. The smallest sizes is supposed to fit ages 4-6, so I thought it would be perfect. 

To find out how I got on, read on.